
I finally managed to get my front anti roll bar (or sway bar depending on where your from) picked up (Cheers Mark!). I wasnt impressed with the amount of roll when I drove the car, so I’m hoping this will go a long way to sorting it out. I’d downloaded the instructions from the Danchuk site and was hoping I wouldn’t have to move the intercooler to get it in. Unfortunately when I got it, I had a front bar, but a rear fitting kit. The only real issue was the end link brackets needed to be made up to suit. 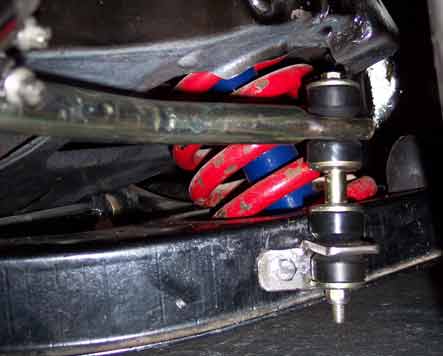 After a lot of fiddling about trying to get it to clear the intercooler, I gave up and pulled it off to give me some more room. With it out of the way, I set it as far back as I could, and measured up some bits of angle to make the mounts. I drilled them out as big as I could, then took it out with the die grinder to fit the rubber mounts. I didnt want to weld them on to the powder coated A-arms, so I made some mounting tabs and welded them to the sides of the angle. With it all bolted up I had another look at the intercooler which needed to be about an inch further forward. I re-bent the front brackets and stuck some spacers that came with the Procharger on the back. I’ll pull it all back off again and paint it when I connect the pipework back up. Doesn’t seem like much but it took a long time to do.
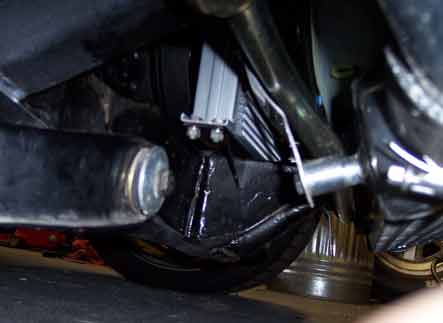
Missing Boost Found
Zane made a connector tube (or fish as he christened it, as it ended up fish shaped!) so I set about fitting it. Its so tight that I had to remove the Procharger and fit it before putting it back on. Some of the bolts are almost impossible to get at so it took a few hours but it looks good done and should help to keep it cooler now I’m not drawing air from above the headers. 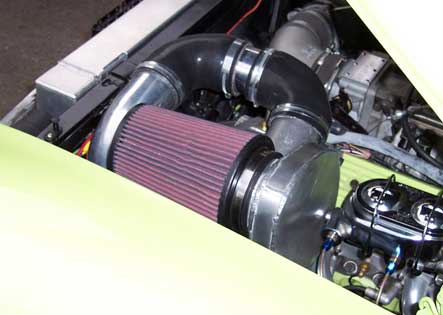 While testing the brakes the other weekend I noticed some compressor chatter as it came off accelerator, so I decided to move the blow off valve to just before the inlet elbow to see if it helped. I found that it was opening as boost increased and dumping constantly. A check of the vacuum feed showed it to always seem to be in vacuum even when there was enough boost to swell the inlet piping. I swapped the dual piston valve out for the old single piston but that made no difference either. I kinked the pipe and got it to dump only when the throttle closed, so after a bit of experimentation made a restrictor with a piece of bar and a jubilee clip on the pipe. This allowed me to adjust it so it only dumped when it should so it’ll be interesting to see how much more performance I get.
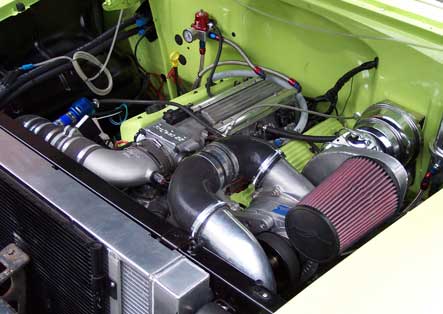
More Brake Problems
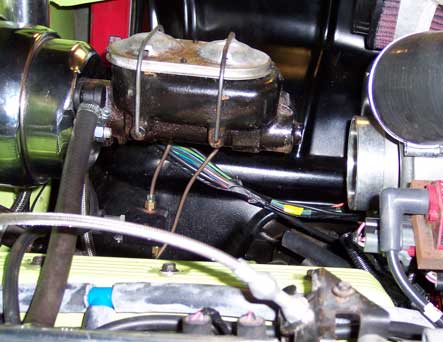
Unfortunately after driving a bit more my brakes went back to being poor, so after triple checking all the pipework I decided to replace the master cylinder. After a bit of searching, I found one that was the right bore on ebay, and it was chrome as well so will look pretty. After bench bleeding it, I fitted it and started bleeding again. The rears were perfect, but I could not get the fronts to push out much fluid with the bleeders open. I re-bled the master and gave it another go but still wasnt moving much fluid at the front. A quick test and I could lock one of the fronts, and the car stops better than ever but I’m not convinced they are working as well as they could. A check of the pin to master distance with some play-doh showed it to be about a mm out so I’m at a loss what can be doing it now. 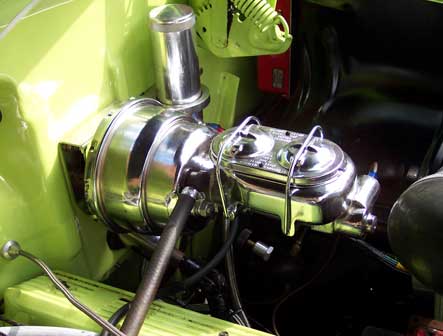 I’d well and truly had enough of messing with brake fluid, including emptying a container over myself coming out from under the car, so decided to have a tidy up of some of the loose wiring instead. I cut the fuel pump relay feed down to the right length, and gaffer taped all the rear loom down. I did the same inside the car and re-connected the reversing lights while I was at it. I also made a bracket for the inner wing to hold it in place as it was missing and did some general tidying up. Not exactly a great day but I’m getting somewhere at least.
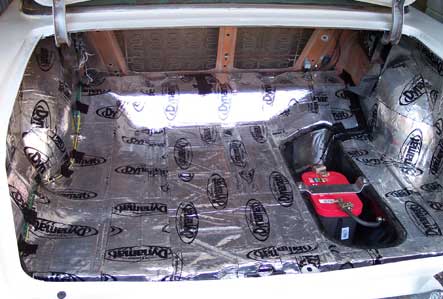
Brakes that work without Prayer
I decided against leaving the brakes as they were and started looking at what I could do to improve them. After a bit of research I decided on either a dual 7″ or a 9″ to replace the existing booster. After a few emails I got hold of a dual 7″ in the UK so I was set for the weekend to work on it. The original one came off without any hassle, but was slow going due to not being able to get a spanner into the bracket and only turning about half a flat at a time. With the master tied up out of the way I did a quick test fit of the new one.

No problems fitting it on the outside, but the rod that connects to the clevis was about 3″ or so too short. I had a dig through my big washing up bowl of old bolts looking for an NF bolt to weld on with no luck. I did find a joiner sleeve though, so decided to use a long bolt with thread on about a third of it and cut it down to suit. I cut a new thread, and after a little trimming screwed it all togetherand put it on for a test fit. The bottom two bolts needed trimming slighlty, but apart from that it all went together easily if a little slowly. A quick test by driving in and out of the garage and they are superb. The only downside is the Procharger inlet is too close to use the rubber pipe I had previously, so the plan of making a U shape to bring the filter up alongside will have to come forward a bit. I had planned to do this so I wasnt drawing hot air from above the headers, just not yet. I’ll get the measurements to Zane and see what he can do.
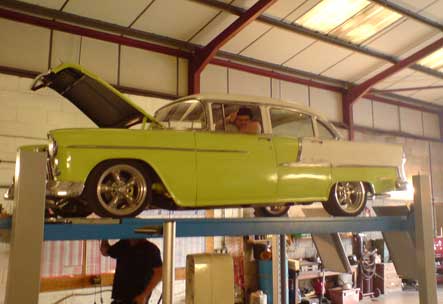
It’s Passed the MOT
I bought all the bits to rebuild the 4L60-E and was waiting for a slot with Zannetec to get it built when I blew the 3/4 clutches on the Camaro. That left me with two identically broken gearboxes, one rebuild slot and one set of parts. As the Camaro is my daily, that got done first leaving the ’55 to wait for another slot and some more parts. It finally got it’s slot a week ago and was collected on a trailer for it’s rebuild. While Zane had it, he made me a parking brake arm so that they worked correctly which left it ready for it’s MOT test, the last but one stage before getting it on the road and driving it legally.
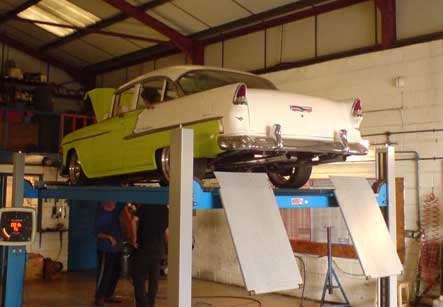
Zane offered to take it to the MOT station for me before he brought it back, which suited me perfectly. I’d forgotten to put the motor on the washer jets but apart from that it needed nothing else before he took it in. That’s the MOT tester’s son at the wheel, who now wants to get a ’55 Bel Air!. It also passed its braking efficiency test, and heres a camera phone video to prove it, but you have to use a lot of muscle to stop it neatly with the single diaphragm 7″ booster. When I got home from work, the certificate and the car were waiting for me. I tidied up the garage and put it away before testing the brand new S&P alternator and declaring it dead. It’s removed ready to get it rebuilt which I’ll hopefully get done in the next week, along with replacing the booster and getting the registration done. Feels great to be getting somewhere with it again after a long wait.
Frankenhood
The ’55 was still out getting it’s gearbox built so I made the most of the space and did some more work on the hood. It had oilcanned where it got run over, and despite my best efforts I wasnt happy with how the repairs to the damage on the front edge came out. I spent a few hours getting the curve at the top front edge right, then cut out the really bad sections with a narrow cutting disk so that I could reshape them before welding them back in.

The corner was really bad, and I ended up filing the edges down so that I could stretch the dent out to somewhere near it’s original shape. Working with tiny tacks at a time to try and stop it distorting was hard work, and looks ugly. Once it’s all ground out it should look OK tho. I also tacked the cross brace back in to hold it in shape, and with a load more hammering it popped back the right way on the top and stayed there. It needs a fair bit more work to smooth it down, but it’s getting there. I ran out of time as I didnt want to rush it with the welds, so it’s back on the truck out of the way for now.

Gearbox Crossmember
With the motor sat on it’s mounts, I needed to sort the gearbox mount out so that it wasnt balanced on a piece of angle iron wedged under there. It also needs to be able to move backward for the 4L80-E so after a lot of lying under there and looking at it I decided to make the mount sit on top of the old Camaro rails and bolt through as this would give me the most room for an exhaust.

My mate John had given me some box section to make it out of, and I set about making the centre section and working back. The mount bolt is not long enough to go through the 2×1″ box section I was using, so I decided to copy the OEM mount and cut a hole big enough for a socket to go in on the bottom. With that done, I worked out the angle for the 2×2″ box and hacksawed it to fit. After the fourth cut I was wishing I had space for a bandsaw in the garage. I tacked it together, then made the two 2×1 arms and bolted it all in place and jacked it up till I had the gearbox where I wanted it on the level. I could then measure up for the two “feet” and after a quick test fit seam welded everything then cut all the ends to match the angles of the uprights. No one will see it, but I want it to look OK. Not much to it really but I’m pleased with my self.

Firewall and Engine Mockup
I’ve been slowly plodding on with the mountain of metalwork on the truck, and wanted to get the front end back on out of the way. I decided to get the firewall partially welded in while I could get at it easily so stripped the intake manfold off and taped it all up ready to work on it. After a bit of hammering I tacked it in then went back over it and filled in the gaps.I really need to get some cleco fasteners it would have been a million times easier and a lot better.

I won a Corvette intake manifold on ebay to replace the truck manifold and make the turbo install a bit easier with the lack of EGR to block up. It’s also better at high revs which is where the turbos will be happy, and a lot better to look at. I couldn’t resist getting the turbos out and mocking it up to get an idea of how it will look. They’ll sit a lot further forward than in the pic, and the left hand one will be clocked round to face the intake. Plenty of space at the moment but I’m sure it’ll end up a lot more cramped by the time it’s on the road.

Plenty of Space
I clamped all the bits of the firewall recess in place, and pulled the hood off to check I had plenty of clearance for the motor. I decided to join the top two halves together first so cut a piece of sheet metal that was long enough to allow me a bit of lattitude when I put the bottom two pieces on. I tacked the top edge first and gradually bent and hammered it into shape as I worked down the seam.

With it in the right shape, I clamped it back in place and decided on how far down I wanted the bottom edges to be. I cut a template from cardboard and transferred it to sheet metal before working my way slowly along the edges. It was a lot harder to keep it all in line so I needed to hammer it as I went. I did the same for the other side and then started to slowly fill the gaps in between the tacks. With it all done a quick test fit and it needed some shaping to clear bellhousing. I started to shape a bulge in it to give me enough clearance in case I go to a 4L80E when the 4L60E blows up. I was out of time then so called it a day.

Plenty of Metalwork to Do
I’ve been working on the roof and hood for a few weeks now, and have got rid of the worst of the creases and dents. I’m slowly getting the hang of getting the metal smooth again afterwards but it’s a real struggle to do. The hood had a deep crease in it that I couldn’t get behind to knock out, so ended up welding washers to the crease and slide hammering it out. The peak in the front is so far gone I gave up and started to make a new one. I also sliced the door up and bent it to fit the frame as it was way out, and am in the process of re-doing a lot of the patchwork where the roof has been chopped and not very well put back together.

I’d also cut the original firewall recess out to set the engine back further, and kept it to cut up and make a new one. After a bit of measuring, I chopped it into four pieces and trimmed the firewall a bit further to get it all to sit where I wanted. I couldn’t get the hood off to check the clearance as it was pouring with rain and I had nowhere to put it with the Bel Air in the garage as well. If it’s all OK, and it certainly looks that way, I’ll tack it in and make up the filler pieces then pull it back out to finish it off. I plan to smooth the rest of the firewall when the cab is off the chassis and I’ve worked out what I’m doing with the steering column and pedals.
