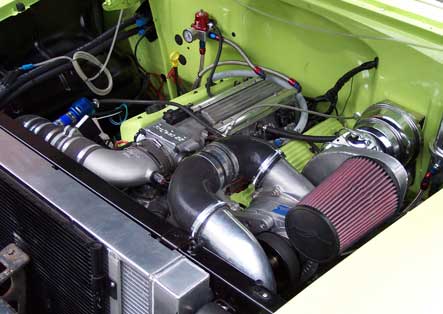
I hated the Intercooler sat way down low at the front of the car, and was convinced that it was going to get a stone through it on the motorway. The tubing also caught on the new wheels at full lock. As I reversed it out one Sunday to work on the truck I decided that was that and took it all off. I connected the Procharger straight to the intake and set about searching for a relatively cheap 76mm intercooler that would fit in between the lower hood lock bracket and the wing. A few months later, and skint, I decided enough was enough and took the lock bracket and the unused as yet AC condenser off, and dropped the old intercooler in it’s place. It looked like it was made to go there, so after making some quick brackets I set about plumbing it in using the old pipework. The pipework needed to go through the two wind deflector panels, which had the horn and alarm sounder on one side, and a relay board on the other. After coming to the conclusion it all looked crap anyway, I cut all the wiring out to re-do it after I’d done the pipework.

With holes cut out of either side, and the hard pipework trimmed and the ends swaged it all went together nicely with a much better run than before. At this point it was time to move on to the wiring. The lamp wiring was extended so that it could pass through the wings behind the deflectors and out of site, and everything put on multi pin plugs so I can remove the core support and swing the wiring out of the way with it. The horn and alarm sounder were hidden, the main fuseboard feed re-run, the MSD box removed completely as I’m not convinced it’s not the cause of a lot of my distributor problems. Washer pump wiring moved, heater controls moved, and the lot run in braided covering to neaten it all up. There is so much on this car I’d do better if I did it again, but I still love it. The only thing left to do at this point was the hood latch. The old latch and bracket are huge, but after some major trimming the bracket cleared the intercooler nicely. The latch will be replaced by a smaller double bear claw one but that was that for the weekend.

 With everything prepared, I pulled the drop spindles and brakes off to fit the new ones. It all went together painlessly, and with the new master cylinder bolted up and new brake lines made up I was ready to bleed it all. Pedal feels really good, but I found a small weep on the rears and will re-make the rear axle line as I’m not happy with it. With it all back on the ground, I was sat up in the sky with about 6" of toe. I got it back up again, dropped the coilovers down an inch and set the toe roughly by eye. Once I’ve driven it up and down the street and allowed it to settle I’ll check it and set it up properly. Looking forward to seeing if it was worth all the pain!
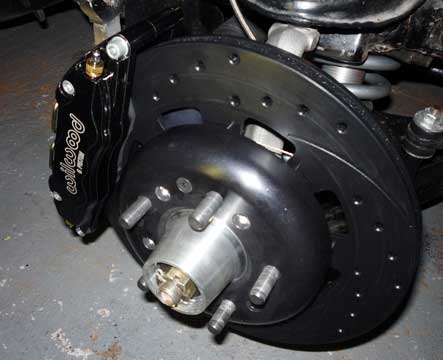
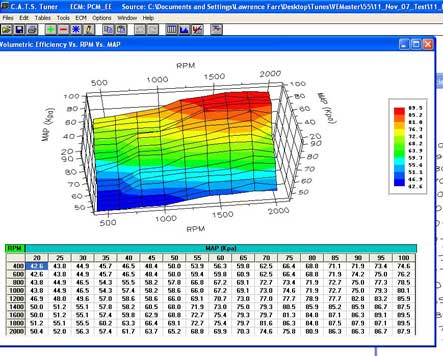
 After a lot of measuring and re-measuring I ended up with a cardbaord template for a new one and set about making it out of aluminium. After a few hours of messing about I was happy with the result and it was ready for a test run. With the logger hooked up, I took it out for a run, gave it a little bit of a tune, then gave it a blast. No change 0-60, still at 5.9 seconds, but it shifts a lot nicer which I guess is the engine getting more air at a given throttle position. Looking forward to driving it again once the new brakes are on.
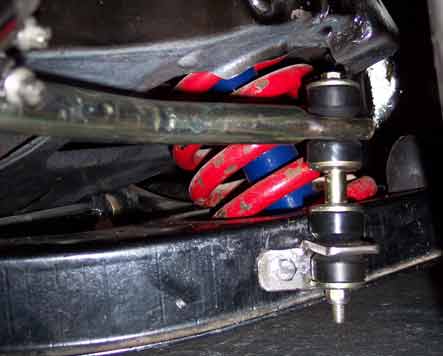
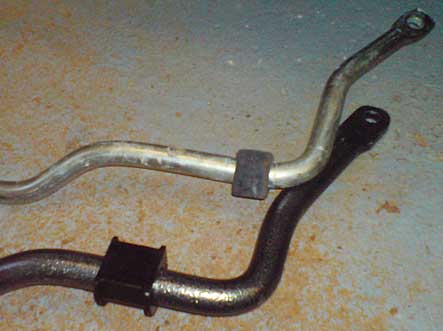 With that done I pulled the old springs and shocks out, and drilled out the A arms for the QA-1 bottom mounts. I ground the rest of the old nuts flat and fitted them on the lowest setting. Unfortunately I crushed a brake hose while I was doing it, so I needed to replace and bleed the brakes. It was so low I couldn’t get the jack under the frame, so I bought a C spanner to raise it back up. I wound them up about an inch a side (I measured with a bolt as I couldn’t get the calipers in there). With it back on the deck, and the brakes bled I took it out for a spin. It handles a million times better now, but the brakes still have air in them so need bleeding again. Progress at last.
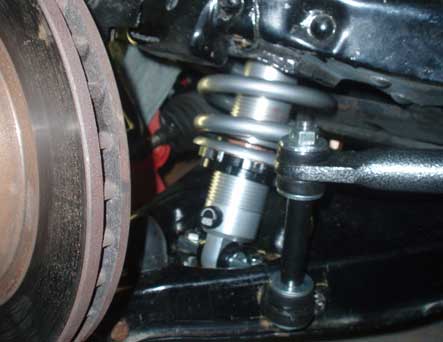
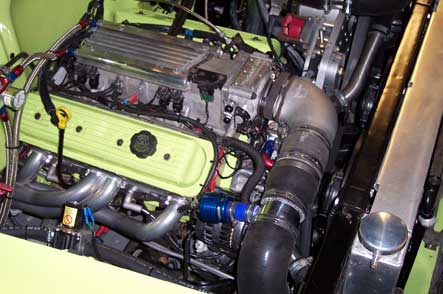
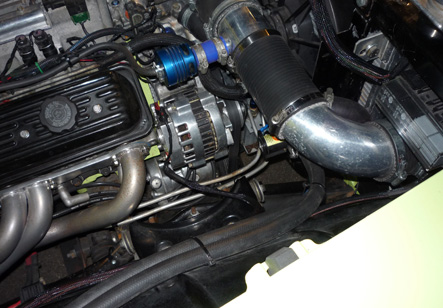
 After a lot of fiddling about trying to get it to clear the intercooler, I gave up and pulled it off to give me some more room. With it out of the way, I set it as far back as I could, and measured up some bits of angle to make the mounts. I drilled them out as big as I could, then took it out with the die grinder to fit the rubber mounts. I didnt want to weld them on to the powder coated A-arms, so I made some mounting tabs and welded them to the sides of the angle. With it all bolted up I had another look at the intercooler which needed to be about an inch further forward. I re-bent the front brackets and stuck some spacers that came with the Procharger on the back. I’ll pull it all back off again and paint it when I connect the pipework back up. Doesn’t seem like much but it took a long time to do.
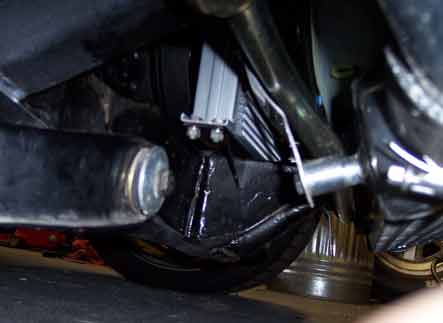
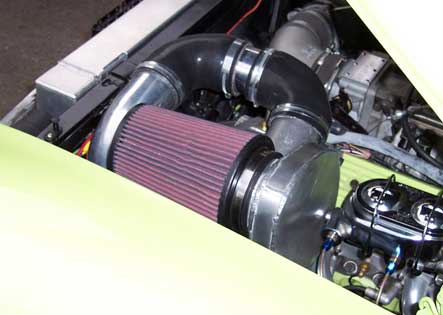 While testing the brakes the other weekend I noticed some compressor chatter as it came off accelerator, so I decided to move the blow off valve to just before the inlet elbow to see if it helped. I found that it was opening as boost increased and dumping constantly. A check of the vacuum feed showed it to always seem to be in vacuum even when there was enough boost to swell the inlet piping. I swapped the dual piston valve out for the old single piston but that made no difference either. I kinked the pipe and got it to dump only when the throttle closed, so after a bit of experimentation made a restrictor with a piece of bar and a jubilee clip on the pipe. This allowed me to adjust it so it only dumped when it should so it’ll be interesting to see how much more performance I get.