Category Archives: General

Intercooler Move and Wiring Re-do

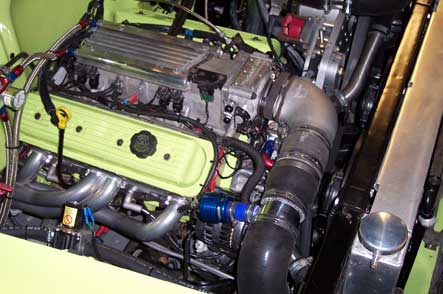
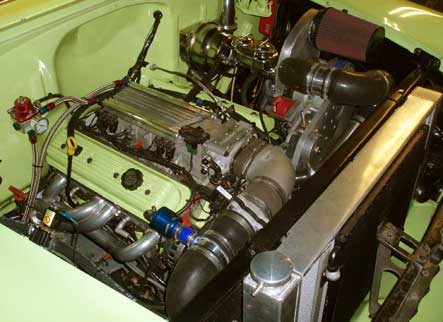
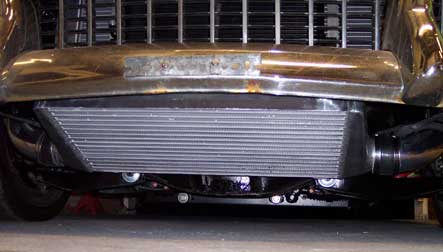
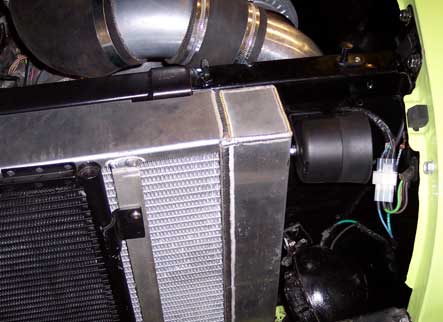
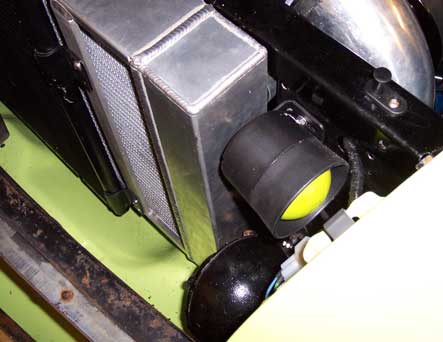
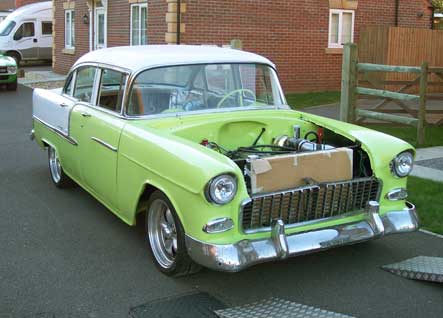
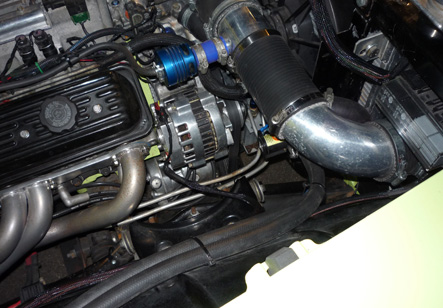
I hated the Intercooler sat way down low at the front of the car, and was convinced that it was going to get a stone through it on the motorway. The tubing also caught on the new wheels at full lock. As I reversed it out one Sunday to work on the truck I decided that was that and took it all off. I connected the Procharger straight to the intake and set about searching for a relatively cheap 76mm intercooler that would fit in between the lower hood lock bracket and the wing. A few months later, and skint, I decided enough was enough and took the lock bracket and the unused as yet AC condenser off, and dropped the old intercooler in it’s place. It looked like it was made to go there, so after making some quick brackets I set about plumbing it in using the old pipework. The pipework needed to go through the two wind deflector panels, which had the horn and alarm sounder on one side, and a relay board on the other. After coming to the conclusion it all looked crap anyway, I cut all the wiring out to re-do it after I’d done the pipework.

With holes cut out of either side, and the hard pipework trimmed and the ends swaged it all went together nicely with a much better run than before. At this point it was time to move on to the wiring. The lamp wiring was extended so that it could pass through the wings behind the deflectors and out of site, and everything put on multi pin plugs so I can remove the core support and swing the wiring out of the way with it. The horn and alarm sounder were hidden, the main fuseboard feed re-run, the MSD box removed completely as I’m not convinced it’s not the cause of a lot of my distributor problems. Washer pump wiring moved, heater controls moved, and the lot run in braided covering to neaten it all up. There is so much on this car I’d do better if I did it again, but I still love it. The only thing left to do at this point was the hood latch. The old latch and bracket are huge, but after some major trimming the bracket cleared the intercooler nicely. The latch will be replaced by a smaller double bear claw one but that was that for the weekend.
Squeaky Belts and Seat Belts

I’ve been tuning the Camaro for a few weeks now, and wasnt happy with the results. After a lot of research I realised I’d have to start again as the MAF was screwing up the logging. I knew I’d have to do the same on the ’55 so decided to pull the MAF out and replace it with a tube instead. While I had it all disconnected I set about trying to sort out the bearing squeak from the serpentine. I’d ground the mounting tabs of the alternator down last weekend to bring it further forward, and decided it was down to tension in the end. I undid the top mount and backed off the belt till the tension was right., then made a strap to hold it in place while I tested it. A quick fire up and no sign of the squeak, so that’s that done till I make a decent bracket.

Look-Ma-No-Maf.jpg

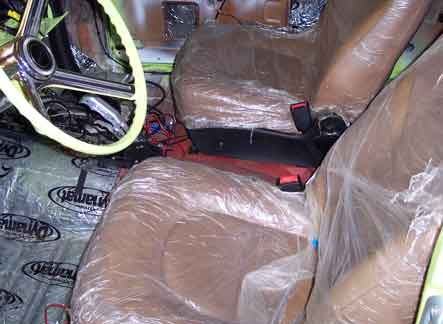
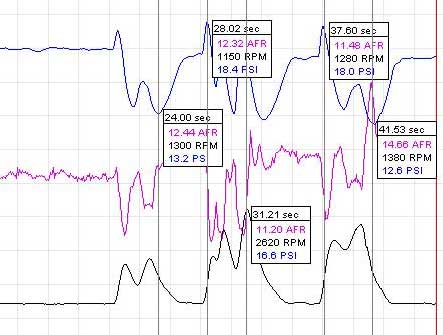
I’d also bought the seatbelts for the car this week, after deciding that driving it without them was just plain dumb. The pillar mounts had been put in by Zane when he did the exhaust and stuff so it was a pretty easy job. It took longer to swap the latches on the seats than it did to fit the rest of the belts. With it now a lot safer, I can take Poppy to school in it so I put the manky old door panel on temporarily for her and fitted a door handle. A bit of a test drive with the datalogger showed my new map which I’d based on a tune I’d downloaded was close enough to get me started so after it had settled a bit I gave it some stick. I hit the rev limiter, even with the pedal travel limited to 90 odd percent (Just in case). Reading through the logs afterwards revealed that the blow off valve is dumping boost when it shouldnt be, so that will need a better restriction in the hose. After a bit of googling I found the suggestion of using a welder tip, so it’s got a 0.6mm one in there now, and the new map based on the drive is in there ready to do some more driving.

First-Map.jpg

Bit of Tidying Up

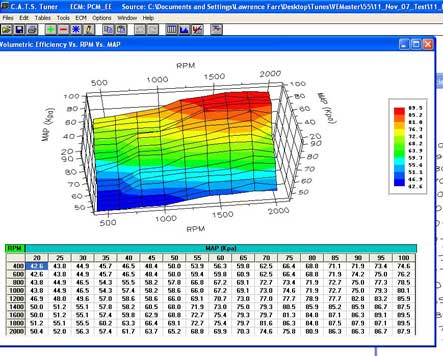
I’ve been doing lots of little jobs on the car over the last month, and decided it was time to sit down and do an update. The trunk has it’s seal fitted now, a couple of the doors have the old dirty door cards fitted temporarily and the heater control solenoid is fitted and functioning ready for some winter driving. I’ve also started to tune the car for part throttle and idle. It was running way too rich at idle as I’ve forced the computer to not control thr fuelling when it’s below 1200rpm and that gave me about 10:1 AFR. I got it to sit at 13.5:1 on my second guess so that’ll do for now. I also did a couple of short runs with the datalogger on and started to set the volumetric efficiency tables up. It’s smoother already as it should be, and with a few 45 minute runs to work planned in the next week or so I should end up with it pretty much nailed.

Motor-Tidied.jpg

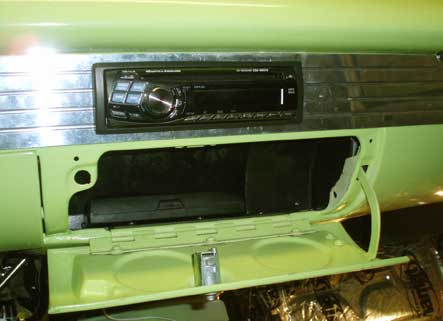
It’s getting pretty cold here so I wanted to get the heating outlets fitted and functional. It was a relatively easy job so I decided to fit the stereo and the glovebox while I was at it. After about an hour of messing about, I realised the dash was bent out of shape which was why the screws wouldnt reach. With it bent back into shape, and some trimming done I screwed it all together and called it quits. The only other job I did was some tidying on the wiring to tape some odd wires, and zip tie it all to the core support out of the way. Looking forward to driving it this week as Poppy is on half term so I’m not doing the school run.

Radio-and-Box.jpg

Out for its first proper drive

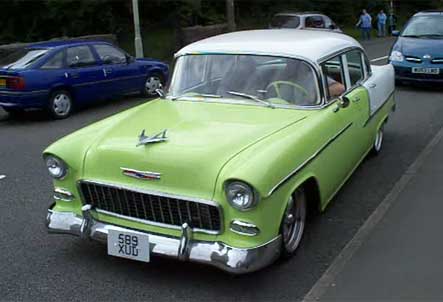
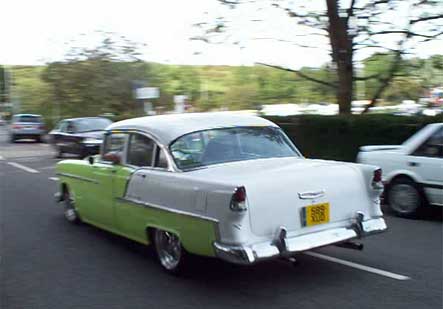
I spent a couple of nights in the week working on the car, and got some bits and pieces that I could do without making too much noise done. I got the sway bar brackets clearanced and painted then re-fitted it all, got the procharger pipework back in and tightened up and the intercooler bolted up tight. I also got a catch can fitted and re-routed all the rubber pipework and some of the engine wiring. I’d also noticed the ignition key getting hot, even though all the heavy circuits are on relays, so I pulled it and fitted some heavy duty relays to take all of the load from the switch. I did an oil and filter change on Saturday and decided to take it out for a proper drive on Sunday. My mate John was going to a classic car show that was about 25 miles from the house, and needed to borrow my scanner, so I emptied out all the junk, put some tools in a bag, temporarily wired in the sat nav and I was on my way. I set the speedo as I drove using the sat nav as a reference, and it’s pretty much spot on. I stopped off at my parents house on the way, and pumped up a low tyre and set off again. It drove really well, and apart from being unbelievably hot inside it was faultless. It definately needs some tuning but according to the datalogger its running OK. After getting a cold drink and a quick hello, I set off again and John took some video of the car. As I drove off the throttle cable decided to come loose, so after a quick repair and moving the Lokar pedal so it wasnt stopping on the cable I was off.

Me-on-The-Road.jpg

On the way home it developed a knock in the front end somewhere, but drove well so I carried on home. I cant see anything obvious, and it was way too hot to climb under so I put it in the garage and will have a look at it in the week. The only other issue I found was the headlights have stopped working, I cant hear the relays clicking so I’ll have a look at that as well. Pretty damn happy with it I must say. Really, really need a carpet in there as my trainers were sticking to the floor! Oh and heres a video of it on YouTube, courtesy of John.

Me-Leaving.jpg

It’s Passed the MOT

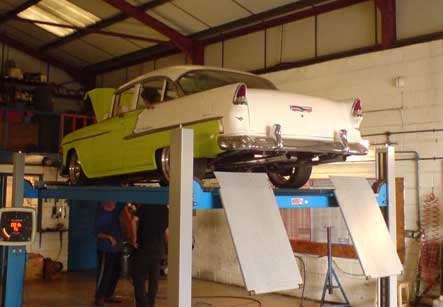
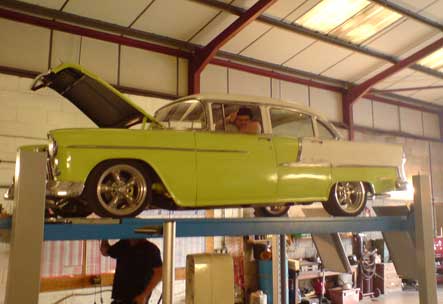
I bought all the bits to rebuild the 4L60-E and was waiting for a slot with Zannetec to get it built when I blew the 3/4 clutches on the Camaro. That left me with two identically broken gearboxes, one rebuild slot and one set of parts. As the Camaro is my daily, that got done first leaving the ’55 to wait for another slot and some more parts. It finally got it’s slot a week ago and was collected on a trailer for it’s rebuild. While Zane had it, he made me a parking brake arm so that they worked correctly which left it ready for it’s MOT test, the last but one stage before getting it on the road and driving it legally.

On-The-Ramp.jpg

Zane offered to take it to the MOT station for me before he brought it back, which suited me perfectly. I’d forgotten to put the motor on the washer jets but apart from that it needed nothing else before he took it in. That’s the MOT tester’s son at the wheel, who now wants to get a ’55 Bel Air!. It also passed its braking efficiency test, and heres a camera phone video to prove it, but you have to use a lot of muscle to stop it neatly with the single diaphragm 7″ booster. When I got home from work, the certificate and the car were waiting for me. I tidied up the garage and put it away before testing the brand new S&P alternator and declaring it dead. It’s removed ready to get it rebuilt which I’ll hopefully get done in the next week, along with replacing the booster and getting the registration done. Feels great to be getting somewhere with it again after a long wait.

Thumbs-Up.jpg

It’s Back Alive

I’d bought some more ally 90’s to finish off the plumbing again so with the intercooler hung on it’s new brackets I measured up to cut them down to suit. Once I was happy that it would work I started clamping it all up before checking that it cleared the wheels. It took a lot of adjusting to get it really tight and now has about half an inch on full lock so that should be fine. I left the intercooler on the higher of the two bracket holes so if it scrapes anything it’ll be the chassis first. I think I’ll get some mesh to save it from stones too. A quick test drive confirmed it was all fine, and I managed to accelerate at .06G when I blipped it too. Sounds impressive anyway. I also discovered the one way valve on the brake booster is not working when I lost the brakes. Wont do that again in a hurry.

Intercooler-Hung.jpg

Next on the list was to tidy up as the garage was filthy. With the worst of it done I wired in the AC/Heater system earth and the compressor control wires out into the engine bay. The seats were swapped left to right so needed the seat belt mounts swapping which was easy enough to do apart from a little trimming of the covers here and there. I got the back seat down from the roof and gave it a clean before putting it in, then got all the garnish mouldings down and fitted the front and rear on the drivers side. I’m hoping to get it watertight before the MOT test as it has been raining here for what seems like months. With a bit of luck I’ll get the other side done when I turn the car around.

Belts-Swap.jpg

First Proper Drive

I finally got the prop re-made to fit (don’t ask) and the limited slip oil so I got it up on stands and fitted the prop and filled it up. I fired it up and put it into gear and gave it a bit of throttle to make sure it was changing gear. It didn’t. I plufged the laptop in and it was showing a very low speed from the speed sensor, even tho it had been re-flashed with the correct gearing adjustment. After checking the wiring to the sensor which all seemed OK, I pulled the sensor out and gave it a clean. That made no difference, and it was setting some fault codes for the gearbox. After a lot of research, I found that the gearbox that had been sold to me as a ’94 was in fact a ’97. They use a different base program on the PCM, and it uses a PWM solenoid for the torque converter clutch.

video.jpg

I was pretty gutted at the thought of having to pull the box and swap it over for the spare one I had, so spent the next day researching what the physical differences were. It turns out I could use a ’95 base (the ’96 and ’97 are different engine computer wise) and it needs an extra wire run from the PCM to the box to control the clutch. I downloaded a base tune for a Camaro, made a few changes and flashed it on. With it back on stands, the speed got up to around 40mph without much effort. The rear brakes were not stopping the wheels turning, so I needed to bleed them properly. As I was about to start doing it, my mate Leigh turned up so he got roped in to pump the brakes while I bled all 4 wheels. With it all done, I realised it was ready to go. I got it off the stands, and drove it out of the garage shaking like a leaf. A quick drive forward and back and it all worked but I was out of fuel again. After getting some more, I got Lisa to video of it which you can watchhere! After all the work it was more than worth it. It’s an amazing feeling. I didnt want to push it too hard without getting some decent data off the datalogger just in case I’m running really lean somewhere along the line, so thats next. What a truly great moment in a project.

Logworks.jpg

Re-Doing Stuff

I started off on Saturday intending to have a look at the parking brake and a few other bits, but after a bit of checking realised I couldn’t get away with using a long one as there just wasn’t any room to put it. I marked it for the length I needed and moved on to wiring again. I had a few more wires to run that I had left coiled up till now, and a few of these were for the alarm. I had another look at the way the rest of the wiring ran to the core support and decided I wasn’t happy leaving it like it was even temporarily.

Front-Wiring-V2.jpg

I cut and shortened the lights and horn wiring and fitted a waterproof plug to it which gave me enough room to run the alarm wiring neatly. I taped it all up and fitted the siren which coincidentally is bright green too which just left the bonnet pin switch to do for the alarm at the front. I drilled the two holes for it and fitted the wire then gave it a quick test by accidentally setting it all off which was a surprise in a quiet garage. I then found that the horn wire was loose and I couldn’t get to the screw to tighten it. It was also nearly impossible to get to the bolts that held the horn on, so after nearly an hour of messing about I had the horn wiring tightened and it back on. I did the same to the wiring on the other side as well and re-made some other bits that I didn’t like too. There’s nothing much to see, but it’s a lot better now.

Toad.jpg

I drove it!

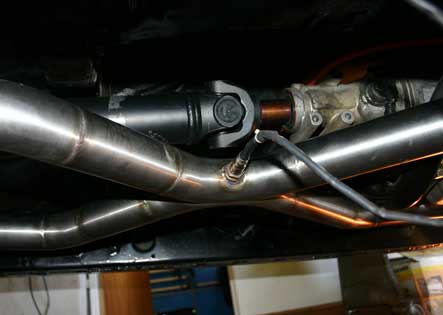
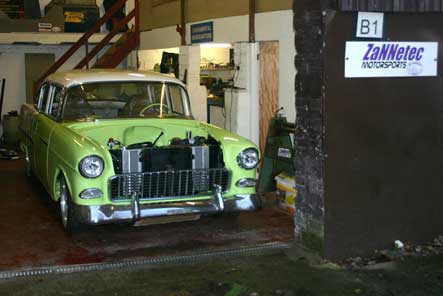
I’ve been popping in to Zannetec to see how it’s been getting on and was extremely happy with the progress. I wanted the exhaust done in stainless with an X pipe crossover, and a bung for my datalogger in the centre of it. For silencers, I bought two ebay stainless ones so it was a bit of an unknown how it woul all sound. I also got the seatbelt and seat mounts put in while it was there. It came back on the trailer as a pretty complete car, but I need to connect the heater hoses up so that I can fill it with coolant. I’m also waiting for the oil for the diff to turn up as its currently dry.

X-Pipe.jpg

It’s way too heavy to push up the little ramp into the garage now, and when Zane said to me “drive it in slowly and gently so you dont hurt the axle” I nervously sat behind the wheel and fired it up. It sounds incredible, and you can see the blower hoses flexing as the boost comes in. I gently reversed it in at about half a mile an hour, then ran out of petrol. I had to push it back out, hit the central locking button and leave it on the drive while I went to get some more. With it topped up I started to reverse it back in again, and gave it the tiniest amount of throttle to go up the ramp. It spools up and lifts the car immediately, and scared me to death!. It may not be that powerful in this day of 1000hp+ cars, but it’s enough for me I think. It’s nearly four years to the day since it was pushed into the garage as an old wreck, and here I am driving it. I cant tell you how excited I am.

Tucked-Away-at-Zannetec.jpg

Car Leaves Garage

Zane rang me a week or so ago and told me he was ready to take the car. I was pretty much ready to go and just needed to empty some of the spare parts and boxes out of the car. With it all stacked up in the garage, I pushed it out into the daylight and waited for Zane to turn up with the trailer.

Off-She-Goes.jpg

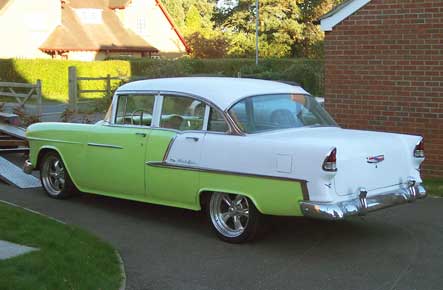
I had to take some pictures as it left the garage for the first time in nearly four years. For all the faults I have with it, it looked superb on the trailer. I felt really strange seeing it dissapear up the street, but it’ll come back pretty much ready to test drive. I’ve been to look at it since it’s been there, and the exhaust is looking good. I’ll take some pics once it’s all done. The driveshaft turned up as well, so that’s the last of the drivetrain ready to go. Should be back home in a week or so.

Rear-Exit.jpg