
 I pulled all the masking off the bits I painted last weekend, then set about bolting the front end together. My springs are red at the moment, and I’m undecided as to what colour to paint them, so I left them as they were for now. I bought new hardware to put it together as a lot of the threads were knackered, and it made putting it all together easy. It took me longer to work out what way up the calipers went than it did to fit them. I was chuffed to bits with the look of the new front wheels and the calipers through them. I was planning to put the engine in, but the 700R4 is still in work in its box, and I need to paint the steering bits too. I spun the shell over instead, and sanded the roof over quickly before giving it a quick coat of high build primer mixed with standard hardener. It went on well, so I cleaned up ready to do another coat and used the hardener that I was sold to go with it. It sprayed like crap again, and was like jelly by the time I’d got half way down the roof. It’s "extra fast" hardener, so it makes sense. Might be the source of a lot of my problems. Wont be using that again in a hurry.
Painting some more little bits
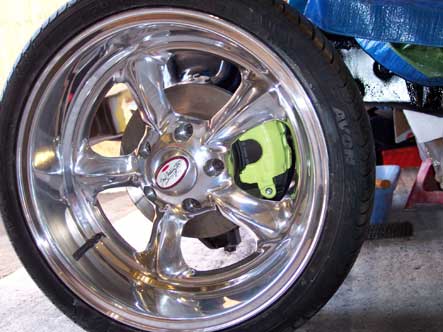
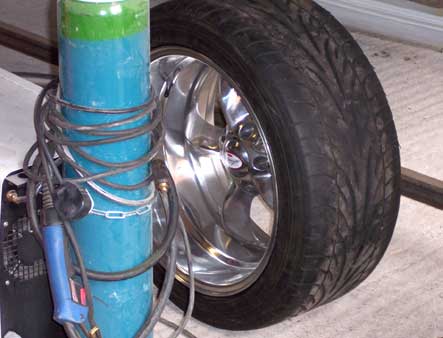
 When I put the wheels on the car, I realised just how much of the suspension would be visible. I had stuck the front end together previously as it came, so it was bare metal. It had small patches of rust on here and there as well. I stripped the brakes off and cleaned the calipers and spindles up ready to paint. I had masked the A-Arms already, so I masked the spindles and calipers and hung it all from the roof ready to paint. A quick coat of etch, and I left it all dry while we went out for lunch. When I got back, I sprayed the spindles and A-Arm mounts black, then washed up for a coat of white for the calipers. White calipers? Nah. A coat of the green I chose for the car and I had some much better looking brakes to put back on. Only thing now is the discs look a little small in those big open wheels……
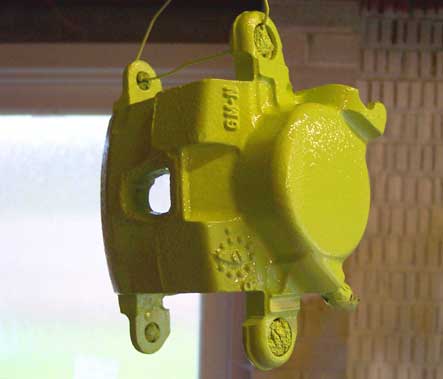
Engine Investigations Continue
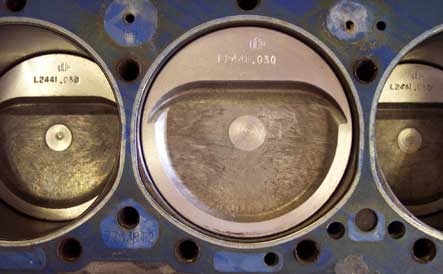 After being so fed up last week, I was determined to find the cause of the 350’s stiffness. I backed off all the rockers to see if it helped, but there was no noticable difference. I had no chice but to pull the inlet manifold, followed by the head on the passenger side. All of the bolts I took out were filthy on the threads, which was odd. Under the head was a FelPro gasket, and some decidedly new looking .030 oversize forged pistons. That makes my 350 a 355 then. The bores were full of crap which turned out to be lumps of silicon gasket. The engine was covered in it when I got it, and the inlet manifold had been sealed with lots of it. I blew it all out, turned it over, then put the head back on. It took me half an hour or so to clean all the bolt threads with the wire brush, and I used a torque wrench for the first time (yes, really!) and torqued it all down. I then read up on how to initially set the rockers, and did them all in sequence. I put the covers back on, then spun it over and re-torqued the rod and cap I took off to check. I’ll polish the manifold then re-seal it and it’s ready to go. One less worry.
Lots more done, Even more to fix.
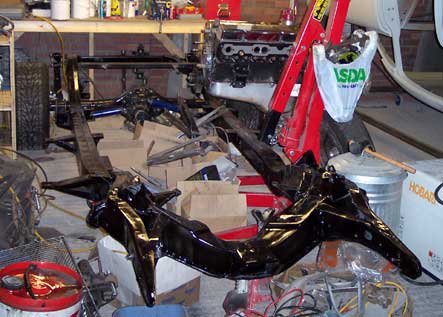
I haven’t had chance to update the site for a while, but I’ve spent loads of time on the car. I pulled the motor and then hung the axle on the new springs. Once it was all rolling, I pulled the front end off again, then cleaned it all up and etched and painted it to match the rest of the frame. I also put a shock bar in, that looks awful, but should work fine. Whle the engine was out I decided to pull the pan and see if I could find why it wouldn;t turn over easily. I spent a few hours trying to get it on my cheapy engine stand without stopping the crank turning, then gave up and took the grinder and welder to it. I now have a chevy only stand!.The problem seems to be the pistons not moving in the bores without a lot of force, another thing to look at. Oh and my new wheels arrived after a year, they look the absolute business but have the wrong backspacing and won’t fit under the car. I felt like setting fire to it by the time I packed in today. I wont though, but I may hit it with something heay till I feel better.
Replacing the Transmission Crossmember
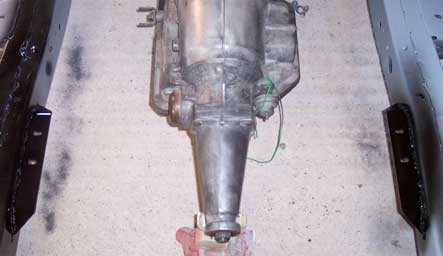 I spent yesterday digging my garden out with my brother in law to lay a patio. There was a big skip on the drive in front of the garage door, so I couldn’t push the chassis out to work on it, so the body went outside in the heat instead. When I put the engine mounts in, I used the old transmission mount to centre it, which was a mistake, as it was nearly an inch out. Once the transmission was up on the jack, the old crossmember was removed, and an axle stand put in to support it. I cut through the old mounts with the grinder, and then spent an hour or so grinding the remains away as far as the bottom edge which I’ll do when I do the underside of the frame. The new supports needed a trim to allow for the curve of the frame, and then I checked and rechecked the position with the new crossmember in place. A few quick tack welds, then pulled the crossmember and welded it. I cleaned up where I had cut off the bellhousing mounts as well, then sanded it all ready for paint. I sanded the crossmember at the same time, then hung it from the roof and etch primed it and the new mounts. A quick coat of black, with the leftover pant sprayed over the mounts and it was time to call it a day. Next thing to do is pull the motor to finish the frame.
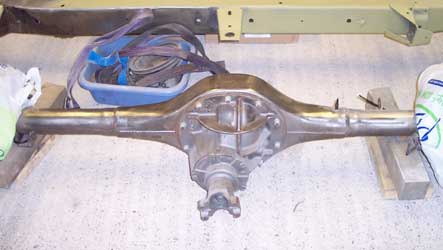
Painting the Rear Axle
I got the old wheels from behind the shed and put them on the axle so I could clean it off with the grinders easily. It was much easier to do, and I soon had it all looking shiny. I cleaned it all down with thinners, then masked up the brakes and the pumpkin nuts etc. ready to paint it. I’d run out of the cheap etch, so I bought some Lechler 2k etch and some 2k black to do the chassis and axle. It sprayed much better, and was a bitch to get off the metal cups I use to mix, so that’s got to be a good thing!. It’s grey as well, not yellow. 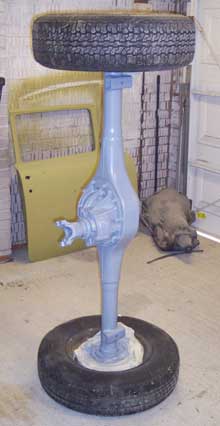 I opened the big tin of black paint, which was really thin compared to the primers. I mixed it up and thinned it a little as well. It’s not the correct thinner, but it’ll be OK for the axle, as the only people who will see it will have been run over. It went on well, and I put a thick coat on and did not worry too much about runs or sags. I only got two where I was trying to spray inside brackets, and overall it looked good. While I was painting, it started to rain and the shell got soaked on the drive. There are a few bare metal patches that have got rust spots on now, but they’ll get done as soon as it’s back on the chassis.
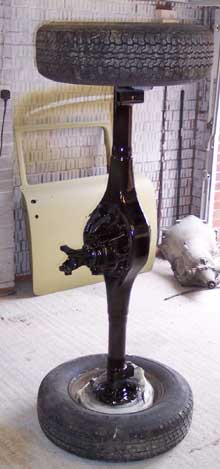
Also Available in Grey
I decided to get the drivers door to filler primer stage today, as I wanted to have a go of my Devilbiss GTi I’d won on Ebay and see if I got a decent result. It had a few pinholes in the filler, and a patch I was not happy with, so I filled and re-sanded it and in a fit of madness used the clarke gun instead of the Devilbiss. It was OK, but not great, so I did it again with the Devilbiss and got a much better finish. I wet sanded it once it was dry, and there was some patterning still visible from the Clarke (orange peel). I left it to do on Sunday, and started cleaning the Currie 9″ axle ready to put it under the frame. The pumpkin has been painted, but is chipped and peeling in places. I’ll get the worst of it off and paint it anyway.
Back Half of the Frame Gets Done
I’ve run out of doors, and have no space in the garage for any more panels. It also looked like a warzone, so I decided to tidy up a bit and clean the frame off in preperation for fitting the axle. I pulled the plastic sheet off the engine, and put all the boxes that were sat between the rails out on the drive. It was raining on and off, so I put the sheet on the boxes and a coat over the motor. It washed a load of the dust off anyway. After a few hours with the grinders I had the majority of the rear two thirds cleaned. 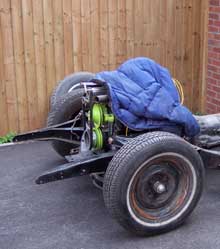 I did the underneath with a wire brush to get the worst of the dirt off, and I’ll hopefully tip the frame on it’s side when the motor comes out again and paint it then. I gave it a quick sand, and cleaned it all off with thinners. At this point I vacced up and blew it all clean ready to paint. I used the clarke gun again, with the pressure set higher than last time, and a bit more thinners. I sprayed two quite heavy coats on, and it only ran where I put loads on to try and fill inside a bracket. Gave it twenty minutes or so to harden up a bit, and then tried to push it back in. God knows how I did it last time, as it nearly killed me pushing it. I ended up having to lever against the wheels, as I just couldn’t get it up the little ramp. The sooner the axle is on, the better.
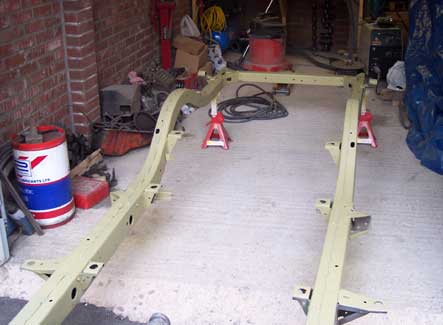
Mmmmm Shiny Bits
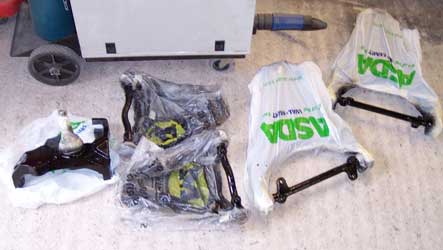
I’ve been collecting bits for a while, and having them shipped to a shipping agent in New York ready to bring across. I had collected most of the parts I wanted to build the 400 into a blower motor, with an all forged rotating assembly, along with hundreds of nuts and bolts to put the car back together.
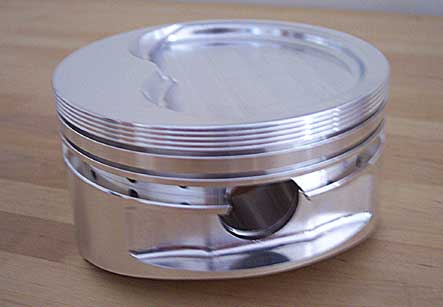
I spent a good few hours going through it all, double checking everything was correct, and was all there. I’ve never seen forged rods or pistons before, and I think they are a thing of beauty. I spent ages just looking at them, then had to pack it all away for a few months at least. It will give me something to do in the winter I suppose. Among the boxes was a new gearbox cross member, and a new 700R4 gearbox which was too big for the boot on my trusty Volvo. I’ll bring it home from work in the company van when I’ve got five minutes.
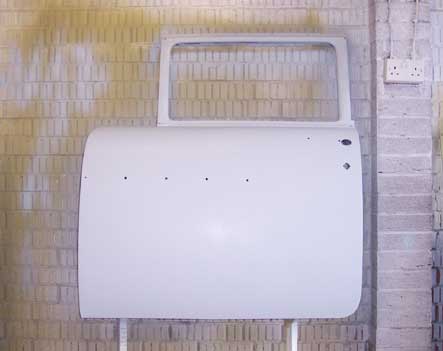
Drivers Door goes a Bit Wrong
On Saturday the weather was still bad, so I put a tarpaulin over the shell and pushed it outside. It was only showering now and then, so I didn’t feel too bad about it. A few hours of filling and sanding later, I was still finding slight ripples and having to re-fill bits of it. Another few hours of filling, and it looked OK, so I gave it a finail air sanding and got ready to paint with the new 1.4mm gun I bought from Machine Mart. It didn’t paint well, and left spatter marks in the paint. I messed around with the gun, and got a slightly better result, but still wasn’t happy with it.
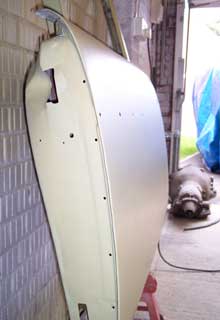
On Sunday, after fixing everyone and their dogs PC’s, I got out the garage about 5.30pm to have a look at how the paint had dried. It was rough, and had blistered in a few spots. The cheap moisture trap on the compressor had been filling up a lot, so I pulled the compressor out and undid the seal on one end. When I tipped it up, at least two pints of rusty water sloshed out. I kept tipping it till no more came out, cleaned the filter and the fan, and fixed the noisy rattle from the cover. I air sanded the door, cleaned it off with air and clean cloths, and mxed up some more paint.
The result from the gun was still dissapointing, but a little better. My backup plan was to try out the 1.2mm Devilbiss SRi gun I had bought on e-bay. I was genuinely amazed at the difference between them. It was smoother, the paint went on much, much flatter and lasted longer. In the end I ran it out on the wall of the garage as I’d painted every bit I could. You can see the result in the pic above. I’m going to pick a colour and shoot a door as a test next. I’ve got plenty to choose from!