Front End Rebuild and More Engine Bits

Had a really nice Christmas, then got back in the garage once I was sober!. It’s really cold in there, and the little 500w heater I bought just doesn’t cut it. The 1″ gap under the garage door doesn’t help either.
400_Bare.jpg

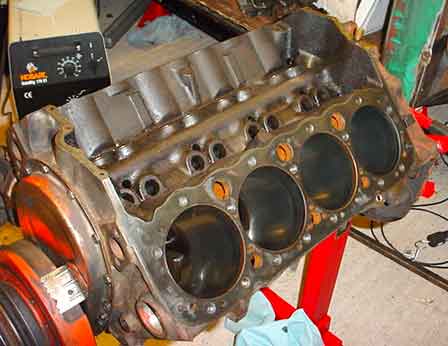
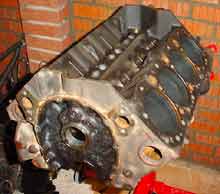
I wanted to get the 400 down to a bare block ready for the rebore. As I’ve never built an engine before, I’m enjoying learning how it all goes together, and planning what bits to use on the rebuild. It’s ready to go to a machine shop when I have some cash now. No rush though. The 350 will see me through.
SpringIn.jpg

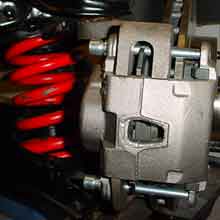
I put the crappy spring compressors on the springs I’d got from Adam, and took the bolts out of the bottom mounting to allow me to get the spring in. I only had a little bit of time, so ended up rushing it, and doing it all again properly this morning. I left it all on really long bolts last night so I could avoid being divorced when some friends arrived for a meal! Once it was all on properly, I fitted the rotor and new bearings loosely, then hung the brakes loosely as well.
With a wheel on to check it all moved as it should, it was starting to look like a car again. I had taken the blower off to fit the water neck properly, so once that was on, I reconnected the braided hoses properly, and pulled the spark plugs out to spin the engine over as I had doubts about the fuel pump. With some new hose on the inlet side, I could feel the pump working as the motor turned. It’s about time I ran it again to get my fix!
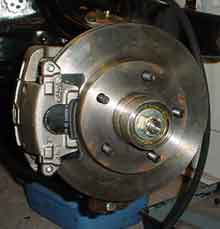
RotorOn.jpg

New Engine Arrives…. Just

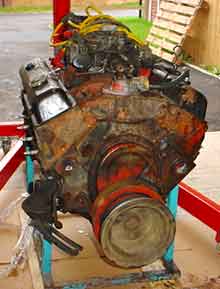
I waited in on Friday for the 400 to arrive. Had a phone call in the morning from the courier company to say that they didn’t have a tail lift lorry to deliver it on, and offered to bring it in a van if I could get it off there. The courier arrived then anounced he’d tipped it off the pallette just before it arrived. The motor had landed on it’s side, busted the dipstick and emptied a lot of it’s water and oil over the van.

400_As_Arrived.jpg

It took me about half an hour to get the engine upright and out of the van. It looked a complete mess, so I put a couple of sheets of cardboard under it and set about cleaning it up. The fall had snapped one of the plugs, but it looked OK. I didn’t know anything about it’s life, apart from the fact it had been on TV I pulled the inlet manifold, then the heads. It all looked in surprisingly good condition. On the Saturday I decided to just “go for it” and strip it down to the block. The oil that came out was black, but there did not seem a lot of sludge.
I bought a cheap engine stand, and bolted the block to it so that I could flip it over. The rods were numbered, so maybe someone had taken them out before. The pistons turned out to be stock, as were the rods, so I pulled all 8 out carefully. I was being careful not to scratch the bores, and was so busy doing it that I dropped a piston on the floor and cracked it. At least that’s decided the “Stock or Not” question!. I’ll take the crank etc. out over the holidays, and then get it crack tested. If it’s all OK. it’ll get the Blower I think..

400_Stripped.jpg

Goodbye Green Engine

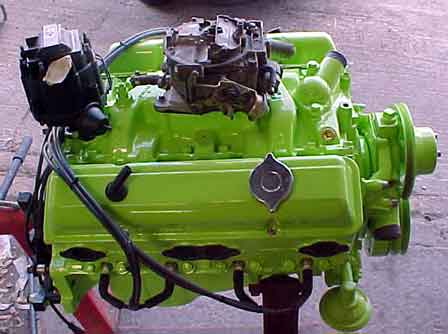
I haven’t had much chance to get into the garage in the last few weeks, but I managed a few hours yesterday and today. Yesterday i changed the lighting in the garage over to double tubes, and swapped my new compressor for a bigger one capable of running air tools. Today I bolted up the original green 350 that I bought for the Dooster to a pallette ready to ship it. Have I done the sensible thing and sold it to help my finances? Umm. No. I’ve swapped it for a 400ci small block.

Green350.jpg

Here’s what the 350 looked like a llloooooonnnngg time ago. June 2002. It’s a little more battered after being put in the Dooster, moved round two garages and generally covered in muck. There should be a load of bits arriving this week, as well as the 400, so i’m going to take some time off and spend some of it on the car.

And Now the Drivers Side…

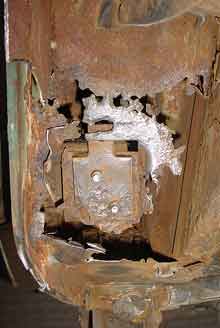
After making the patch panel for the passenger side last week, I decided to have a go at the drivers side one. I had to take the door off, which was about as awkward as it could be due to being close to the garage wall. I ended up holding up the door with my foot while I unbolted it. Not the brightest idea, cos they weigh a ton!

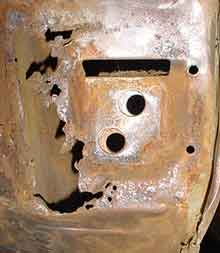
DSRustyBit.jpg

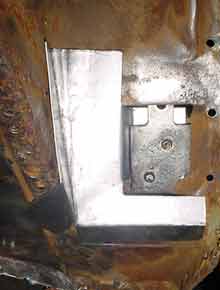
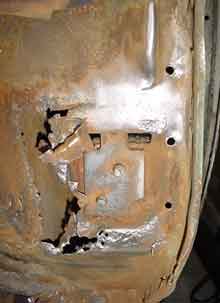
The drivers side was nowhere near as far gone as the passenger side, so I made a panel that would bolt in between the door mount and the bodywork, and cover the rusted out part.

DSPatchPanel.jpg

After measuring it all up, I came up with a template that fitted neatly. I transferred it to metal, and cut it out with the nibbler. Ten minutes with the files, and it was ready to fold.
It went on as it should first time, so I bolted the hinge mount back up to hold it in place, then tacked it in a few places. A few more minutes with the welder and it was in. My welding is not improving much unfortunately, but it’s in solidly. Better go back to doing the floor while I try to get hold of the missing panels for the bulkhead.

DSPanelInPlace.jpg

Hinge mount and Panel Repair

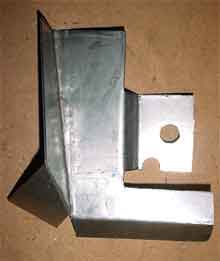
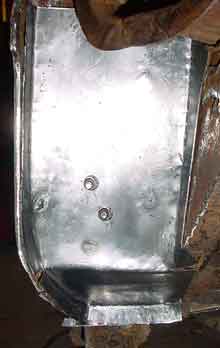
I got some sheet metal on Thursday, and bought a nibbler on Saturday to cut the patch panel from the cardboard template I’d made.The nibbler made cutting the panel easy and I soon had a rough version of the panel ready.

PanelDone.jpg

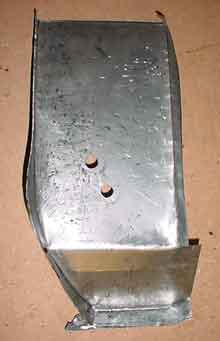
It’s the first time I’d ever tried to make anything like this, and I wished I had done metalwork in school.The shape was easy to fold up but took a lot of shaping to get the bow in the wing and the folds just right. With cardboard you can press it into awkward corners easily, but with metal it needs to be removed, reshaped and tried again. I bolted the hinge back into place, then marked and drilled the holes for the rear of the hinge mount.

HingeMntPocket.jpg

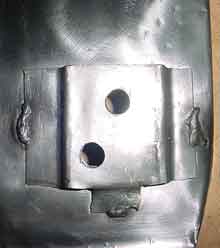
The hinge mount bolted into a pressed hole on the original, so I made a small pocket for it and welded it to the back of the patch.
With the hinge mounting dropped into the pocket, and the mounting bolts tightened up, the edges could be tidied up and the whole lot tweaked to fit with a file. I’ll weld it in place once the other sides done so I can take any measurements I need from it. I’m chuffed to bits.

PanelInPlace.jpg

Inner Wing Template

Didn’t have much time to work on the car today, so measured the area that needed replacing on the inner wings to make a cardboard template. If I get it all right, I should be able to flip it over to cut the one for the other side. Well thats the plan any way!

InnerWingRemoved.jpg

The remains of the existing inner wing were removed by drilling out the spot welds. My trusty old drill is starting to get a bit tired, and the drill bits don’t last long drilling through weld either. This gave me enough room to measure up accurately (ish).

Template.jpg

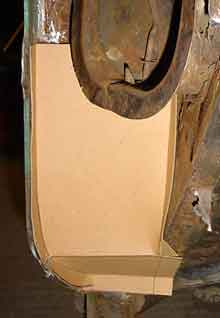
After measuring it all up carefully I made a rough template from some cardboard. I used this to get the curved shape of the wings drawn out, and made a final template. This was scored along all the folds and ready to test fit.
And there you go. It fits. Now all I’ve got to do is make a metal one. As it’s getting colder and darker as winter draws in, I need to sort out the electrics in the garage. When we bought the house, it had a single 40 watt bulb and one plug. There’s now 4 striplights, but it’s still a bit dark in there. Having no plug sockets near the bench is a pain, so I started running cables ready to install some sockets and the little electric anti-frost heater.

TemplateInPlace.jpg

Inner Wing Repairs

John Fraser, who I met through UK Hotrods called in yesterday to see the car. It was reassuring to talk to someone else about what you’re doing and whether it’s all coming together properly. It seems to me like I’m still taking more off the car than I’m putting on, but it’s moving along.

SideOn.jpg

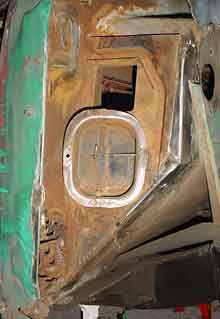
I took the last of the rotten wing off today, and ground the rotten bits out of the passenger side edge of the inner panel. It was worrying seeing so much daylight from the inside after it was cleaned up. I took the heater matrix and the fan housing out, pulled out the last of the old matting and gave it all a good clean ready to patch in a repair panel.

RustyBitInner.jpg

I’ve never made a repair panel in my life, but decided to give it a go. I measured an offcut up and got my panel beating kit that I bought for £12 out. After a few goes, I had the curve at the top pretty much spot on, so carried on with a bit more confidence.

PatchPannel.jpg

Removing the Inner Wings

The inner wings had rusty holes in the bottom on both sides, so today I pulled them off ready for the second hand ones that I’d ordered from Tris-R-Us. The metal had gone really thin at the bottoms, so I started to chisel through carefully. About an inch or so in and poof, the contents of the inner wings fell out.

LotsOfRubbish.jpg

The passenger wing was full from top to bottom of leaves, earth, and rust. Theres an old car key that fell on top of it in the picture, so you can see how much came out. The drivers side had been replaced at some point in the past, and the wing was screwed in rather than welded. After seeing this lot come out, I moved over and pulled that one off as well. Same there. Worse than that, the bottom hinge mount was rotten too.

PassengerInnerWing.jpg

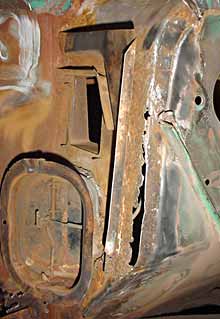
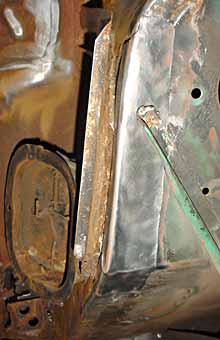
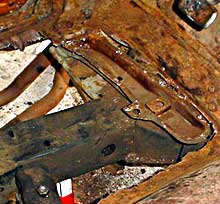
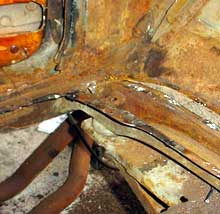
I could see what was behind now to finish taking off the passenger side wing. I drilled a few of the spot welds, and sliced it half way making sure not to hit the air vents. A quick polish with a grinder brush to see what was solid and what was dust, and as you can see, it’s not a pretty sight.

DriverInnerWing.jpg

The drivers side was a little better, but still ropey. I took the passenger door off to get a better look at the damage, and it’s pretty much non-existant there. A quick ask around and the answer seems to be get some good second hand ones, or make new panels. They’re hidden away by the inner wings anyway, so It’ll be lots of cardboard ones and get the panels cut and folded from a template if everything goes to plan. Gutted. But it’ll be OK. Just way beyond what I can do at the mo. I tidied up properly, closed the door and went away to think about it.

Driver’s Floor Repair

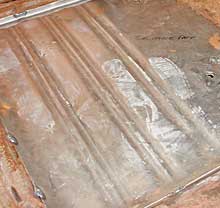
I had the patch panel for the holes in the floor sat in the back of the car, so I decided to make a start on it today. Out of curiosity, I tested the pin holes that I’d found when I was cleaning the footwell originally to see how badly gone they were. Using a broken screwdriver as a punch. I hammered them through. They bent rather than shattered, and the sorrounding area did as well. It looks like the majority of the metal is rock solid, but it’s hard to tell with the brown paint and surface rust.

FloorpanRough.jpg

I hammered a chisel across the holes to split the metal, and sure enough it was clean, silver metal within a centimetre or so. The surface was badly pitted, but it was solid. At this point I was in two minds about patching it or replacing it. In the end I thought “Might as well” and carried on chiseling. A few hours later I had the majority of it out and was knackered. Felt better though as I’d done it by hand.

PillarSupport.jpg

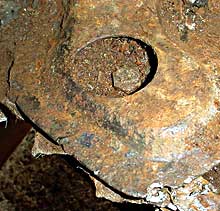
I covered the screen and side windows with thick cardboard and taped up the joins the next day (Sunday) so I could finish the edges with the grinder. The support for the pillar sandwiches the floor to a support underneath, and after looking at it for ages decided to drill the spot welds and split that away and fit the floor properly.
More chiseling and the support was out. I was concerned that the weight of the body would twist it while it was missing the supports. I couldn’t see any movement, but to be on the safe side I left a lip of the original metal and folded it over in the corner under the pillar as a support. The edges were cleaned up with the grinder, and the bolt holding the very tired body mounting rubber removed..

PillarOut.jpg

It was getting late so after checking and double checking, I clamped it as best I could and put a few tacks round the edges. It’ll keep it from moving till I get some decent clamps and a better mask so I dont blind myself trying to hold the metal down as I weld.

FloorTacked.jpg

We Have Ignition!

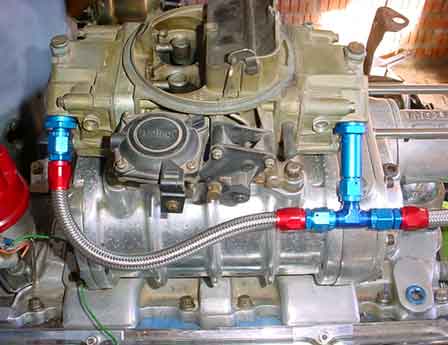
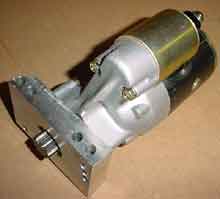
My nice shiny new annodised fuel lines arrived this week, so there wasn’t much else that I needed before I could do a quick test start. Another thing I’d always wanted, sad eh?. Well, I think it looks cool anyway. A new carb gasket, and a quick clean of the top of the blower and it’s looking better. Annodised.jpg Last weekend I put the starter on, found it needed shimming, shimmed it and found it struggled like hell to spin the motor. It didn’t have the best electrical feed, but there were no plugs in either. And to top it all off it fouled the headers. It was time to get a new mini starter. One shiny new starter arrived, and after an hour or so rotating and angling it, then a few shims, and I had a starter that didnt foul the headers. Well, almost. But a bit of careful grinding on the one edge will give me plenty clearance. Even with the poor supply, this spins the motor easily. MiniStarter.jpg So that was it. I had everything I needed to give it a quick test fire. No cooling as yet, so only a couple of seconds. I wired in my MSD ignition and coil, and carefully plugged all the leads in on the spark plugs from the spare engine. A quick check, then another check, and im out of reasons not to start it. I poured a splash of fuel into the carb, stood well back and spun it over. A few turns and BANG. A backfire through the carb and blower. After reading how much damage a backfire can do, I felt sick. I went and sat down for 5 minutes, then pulled the carb and spun the blower over to look for damage. It all looked fine, though the carb was definately cleaner!. I decided to check the spare engine for the rotor position at TDC, and noticed the numbers on the intake manifold. I had the left and right bank reversed. Every book I’d looked in said number one cylinder was on the left bank. I never thought to check which side they meant by left. Wires off again, and plugged back in the right way round. Another splash of fuel, and nervously spun it over again…. RRRRRRRRMMMMM!!!!!!!. My first supercharged V8 was alive. And boy did it sound good to me. I rang everyone I knew, and got Bob round to start it while I videoed it. Have a listen for yourself. Now I’m motivated!