I set out today to do some little bits and bobs as I didn’t have much time this weekend. I drove it out and turned it round first so that I could work on the other side of the car. First thing was the missing bit of trim on the wing, no real drama there. Next was a few adjustments to the trunk lock to get it to sit a little better. Unfortunately I managed to chip the edge of the paint while I was doing it. Yet another battle scar, and it’s not on the road!. I was running out of time so I decided to put the battery hold down that my mate John gave me. 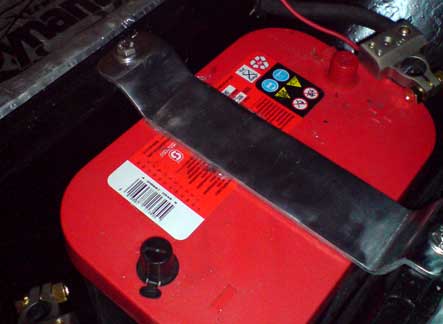 I think I must be getting the hot-rod bug as I decided it wasn’t pretty enough despite the fact it will ultimately be covered over. I made a cardboard template for the rough shape that I wanted and folded it to get the correct length. Once that was done, I transferred it to a strip of aluminium and started to fold it up. After a lot of careful checking and re-shaping I rounded off the corners and sanded the scratches out before giving it a quick polish. Two stainless bolts and the battery isn’t going anywhere. It will have an MDF cover over the whole thing so I don’t lose any trunk space. Another little job off the list.
It’s Back Alive
I’d bought some more ally 90’s to finish off the plumbing again so with the intercooler hung on it’s new brackets I measured up to cut them down to suit. Once I was happy that it would work I started clamping it all up before checking that it cleared the wheels. It took a lot of adjusting to get it really tight and now has about half an inch on full lock so that should be fine. I left the intercooler on the higher of the two bracket holes so if it scrapes anything it’ll be the chassis first. I think I’ll get some mesh to save it from stones too. A quick test drive confirmed it was all fine, and I managed to accelerate at .06G when I blipped it too. Sounds impressive anyway. I also discovered the one way valve on the brake booster is not working when I lost the brakes. Wont do that again in a hurry.
Next on the list was to tidy up as the garage was filthy. With the worst of it done I wired in the AC/Heater system earth and the compressor control wires out into the engine bay. The seats were swapped left to right so needed the seat belt mounts swapping which was easy enough to do apart from a little trimming of the covers here and there. I got the back seat down from the roof and gave it a clean before putting it in, then got all the garnish mouldings down and fitted the front and rear on the drivers side. I’m hoping to get it watertight before the MOT test as it has been raining here for what seems like months. With a bit of luck I’ll get the other side done when I turn the car around.

Intercooler Again
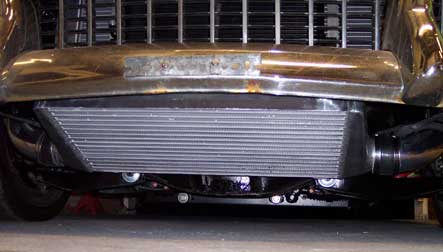
When I drove the car the other day I heard a rubbing noise when the car was on full lock. I had a quick look and couldn’t see anything so planned to have a proper look around later. I was thinking about it the other day and decided it was probably the intercooler plumbing. When I had a look at it I found some rub marks on them and the wheels now just touched it on full lock. When I did this initially the car must have needed to settle as I checked it at full lock. I pulled all the tubing out and started again from scratch. With a cut down aluminium 90 instead of the rubber elbow I got a tighter run that cleared the wheel on lock. 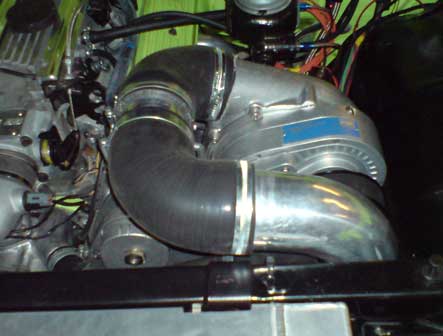 While I had it all in bits I decided to re-mount the intercooler so I could get a few more inches of clearance. It was mounted tight against the core support bracket so my only option was to cut off the rest of the front panel support and have it at a shallower angle. The front of the intercooler was mounted on a short tab from the front panel, and I wasn’t convinced a longer one wouldn’t sag. I decided to make a tab from a piece of steel bar to mount it to the bumper bracket. My newish pillar drill decided to pack in at this point which made it all take twice as long as it should. After a lot of messing about I mounted the intercooler and it fitted perfectly, about an inch or so higher than the bottom of the chassis crossmember. Even though nobody will see it I rounded the edges over before I painted them, I’m in danger of doing stuff properly at this rate.
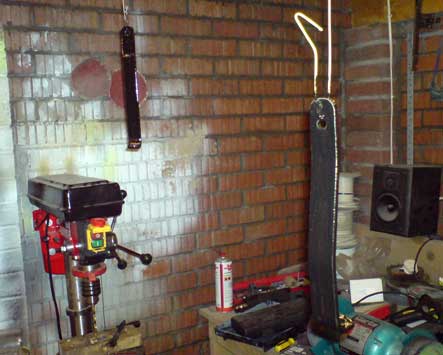
First Proper Drive
I finally got the prop re-made to fit (don’t ask) and the limited slip oil so I got it up on stands and fitted the prop and filled it up. I fired it up and put it into gear and gave it a bit of throttle to make sure it was changing gear. It didn’t. I plufged the laptop in and it was showing a very low speed from the speed sensor, even tho it had been re-flashed with the correct gearing adjustment. After checking the wiring to the sensor which all seemed OK, I pulled the sensor out and gave it a clean. That made no difference, and it was setting some fault codes for the gearbox. After a lot of research, I found that the gearbox that had been sold to me as a ’94 was in fact a ’97. They use a different base program on the PCM, and it uses a PWM solenoid for the torque converter clutch.
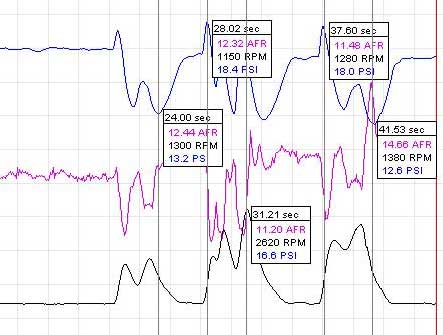
I was pretty gutted at the thought of having to pull the box and swap it over for the spare one I had, so spent the next day researching what the physical differences were. It turns out I could use a ’95 base (the ’96 and ’97 are different engine computer wise) and it needs an extra wire run from the PCM to the box to control the clutch. I downloaded a base tune for a Camaro, made a few changes and flashed it on. With it back on stands, the speed got up to around 40mph without much effort. The rear brakes were not stopping the wheels turning, so I needed to bleed them properly. As I was about to start doing it, my mate Leigh turned up so he got roped in to pump the brakes while I bled all 4 wheels. With it all done, I realised it was ready to go. I got it off the stands, and drove it out of the garage shaking like a leaf. A quick drive forward and back and it all worked but I was out of fuel again. After getting some more, I got Lisa to video of it which you can watchhere! After all the work it was more than worth it. It’s an amazing feeling. I didnt want to push it too hard without getting some decent data off the datalogger just in case I’m running really lean somewhere along the line, so thats next. What a truly great moment in a project.
Re-Doing Stuff
I started off on Saturday intending to have a look at the parking brake and a few other bits, but after a bit of checking realised I couldn’t get away with using a long one as there just wasn’t any room to put it. I marked it for the length I needed and moved on to wiring again. I had a few more wires to run that I had left coiled up till now, and a few of these were for the alarm. I had another look at the way the rest of the wiring ran to the core support and decided I wasn’t happy leaving it like it was even temporarily.
I cut and shortened the lights and horn wiring and fitted a waterproof plug to it which gave me enough room to run the alarm wiring neatly. I taped it all up and fitted the siren which coincidentally is bright green too which just left the bonnet pin switch to do for the alarm at the front. I drilled the two holes for it and fitted the wire then gave it a quick test by accidentally setting it all off which was a surprise in a quiet garage. I then found that the horn wire was loose and I couldn’t get to the screw to tighten it. It was also nearly impossible to get to the bolts that held the horn on, so after nearly an hour of messing about I had the horn wiring tightened and it back on. I did the same to the wiring on the other side as well and re-made some other bits that I didn’t like too. There’s nothing much to see, but it’s a lot better now.
The Hood Is On
The hood has been sat at the paintshop waiting to come back, and they rang me yesterday and asked if they could drop it off today. It was due late morning so after I dropped Poppy to school I came home and tidied up a bit so I could put it straight on. I’d bought some heater hose in the week so I pulled the temporary loop off and drained the system out before I fitted it. With it all filled up I started it and let it heat up. No problems, so thats another part done.
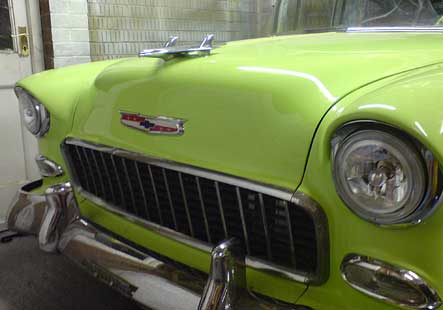
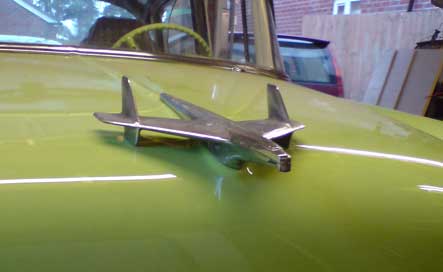
When the hood arrived, I bolted it loosely in place to see how badly out it was. The drivers side sat about an inch too high for some strange reason, and after loosening and repositioning it all it still did. I pressed down on the hood corner and it dropped into place. After some investigation, I found the hinge was very badly worn so I’ll have to push the back down when I close it for now. After a bit of shimming, it sat as equally as I could get it so I tightened it all up and took the latch assembly off to see what was up with it. After ten minutes or so of cleaning and oiling, it works perfectly and locks up securely. I also bolted down the bottom of the striker plate which was a nightmare as its behind the intercooler. A quick polish of the chrome trim and the bird and they were ready to re-fit. The bird is pretty bad, but it still looks good.
Fun with Coolant
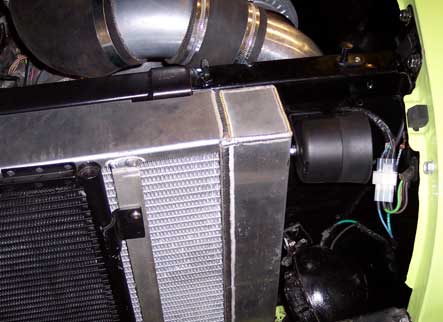
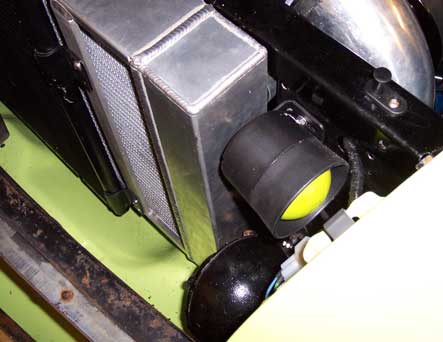
Last weekend I connected up all the coolant hoses and filled the system with water and anti freeze. It didn’t leak, which surprised me so I started the engine and let it heat up. There was a steady drip from somewhere that was running through the intercooler. I shut it off and looked everywher for the source of it. I checked all the hose clamps, tightened the radiator petcock and tried again. It leaked again so I spent the next few hours trying to find it. Eventually I spotted a mist of liquid from the fan, and spotted a tiny hole in the core of the radiator. I drained it all down, and pulled it back out.  I had a go at patching it with solder, but it wouldn’t stick to the aluminium and leaked again under pressure. Zane managed to patch it for me and this weekend I put it back in again. I had also got the hinges back, and they were in the way of the air filter. After a few goes at trying to squeeze it in I gave up and put it below the master cylinder as I’d planned originally. I clamped it all up and filled the radiator to above the point where it had leaked before and started it up and left it warming up. No leaks, and not much fuel left either.This is certainly a thirsty motor. I’d better get the data logger wired in and keep an eye on where the sensor reckons the engine is. I’m back to where I was a week ago, I hate little problems like this.
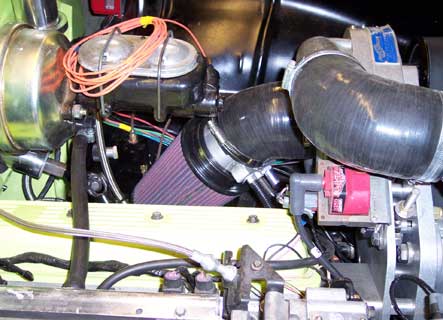
Body is Blasted and Sealed
The truck went off to be blasted and sealed a few weeks ago as planned. It was in a real sorry state after being vandalised and left in the rain. I went through everything with the bodyshop, and asked them to straighten the cab while they were at it as it had been folded in on the corner and bent the door frame. They pulled it back straight with a hydraulic jack thingy and knocked the dent out too. Theres an awful lot of little dents that still need doing, but the rest of them I can have a go at.

The only part that I am really worried about is the roof. It’s badly warped and lumpy. I got them to take all of the old filler out before they painted it so at least I know its not over rust. I’ll have a go at it myself, but I think that may end up back down there to be done. Once it was all sealed, they mixed up a load of left over paint and gave it a coat of colour to waterproof it. The colour they ended up with was blue, I quite like it. Orange may be better tho…. When I get it back in a week or so its going to have to try and squeeze in the garage or back under a cover. I’d prefer it to be in the garage obviously, but it’ll take some creative re-arrangement in there.

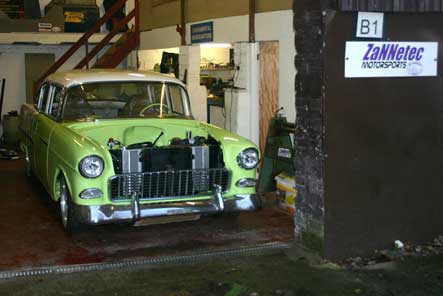
I drove it!
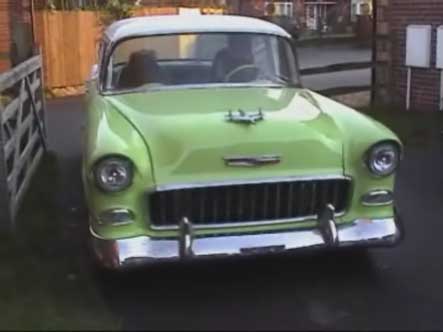
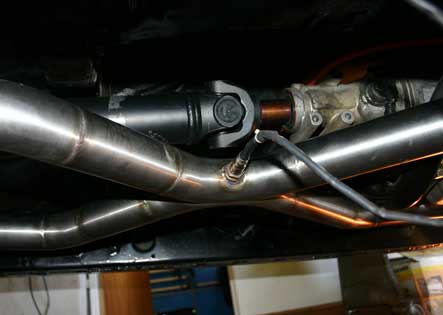
I’ve been popping in to Zannetec to see how it’s been getting on and was extremely happy with the progress. I wanted the exhaust done in stainless with an X pipe crossover, and a bung for my datalogger in the centre of it. For silencers, I bought two ebay stainless ones so it was a bit of an unknown how it woul all sound. I also got the seatbelt and seat mounts put in while it was there. It came back on the trailer as a pretty complete car, but I need to connect the heater hoses up so that I can fill it with coolant. I’m also waiting for the oil for the diff to turn up as its currently dry.
It’s way too heavy to push up the little ramp into the garage now, and when Zane said to me “drive it in slowly and gently so you dont hurt the axle” I nervously sat behind the wheel and fired it up. It sounds incredible, and you can see the blower hoses flexing as the boost comes in. I gently reversed it in at about half a mile an hour, then ran out of petrol. I had to push it back out, hit the central locking button and leave it on the drive while I went to get some more. With it topped up I started to reverse it back in again, and gave it the tiniest amount of throttle to go up the ramp. It spools up and lifts the car immediately, and scared me to death!. It may not be that powerful in this day of 1000hp+ cars, but it’s enough for me I think. It’s nearly four years to the day since it was pushed into the garage as an old wreck, and here I am driving it. I cant tell you how excited I am.
Motor Arrives
I bought a motor off ebay early this year, and have had it sat on a pallette in work waiting for its day. We were quiet in work, and the ’55 was going to get its exhausts done, so I got it dropped over in the works van. It’s a 6.0L LSx series engine from a 2002ish Chevy pickup or SUV. It’s an Iron block with ally heads which have lower compression than the car versions so are perfect for forced induction (can you guess where this is going?)
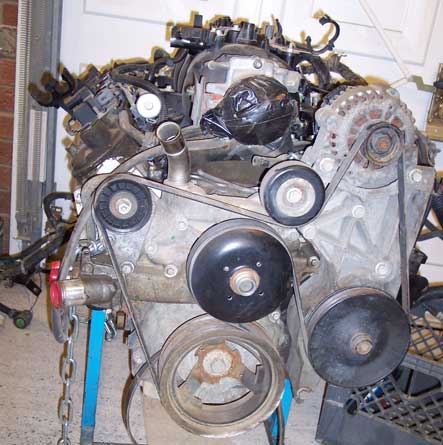
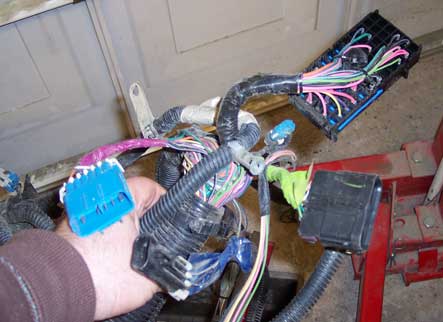
I’m completely comfortable with all of the electronics on the LT1’s in the ’55 and Camaro, but this is the next generation to them and has a lot more wiring to work out. I intend to make my own loom from the factory one as I actually enjoy doing it in a strange and twisted way. I went through all the disconnected plugs and worked out what went where in my head, but was left with a huge bundle of wires. Most of these will be replaced with a new fuseboard or removed but there’s still an awful lot to find. The truck itself is out for media blasting at the same bodyshop that did the Camaro. They are priming it and painting it with a top coat of left over paint to give it some protection from the elements when it comes back. Looks like I have a few years work yet.