All day to fit a tank

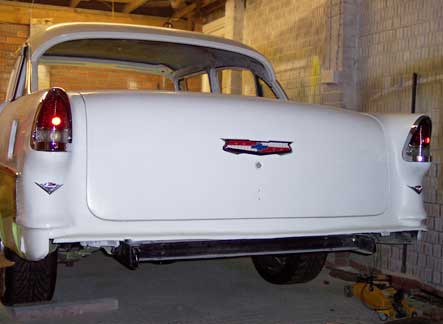
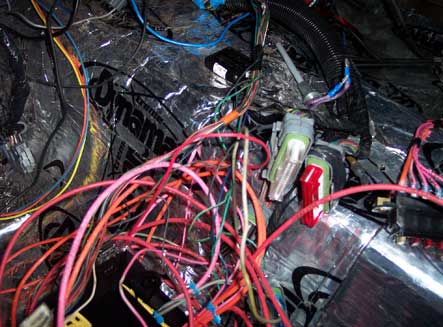
My new stainless tank arrived this week along with a load of parts to repair the Camaro. It’s got a fuel injection pump inside the tank, so it needed wiring in too. It should have been a quick and easy job to do, so I dropped the existing tank down and removed the old straps and mounting bolts. With the tank on the jack, I put it into place and tried to do up the new straps only to find that they seemed about an inch too short. I took it all out again, then hung the straps from the lower mount and tried again. I could just get the end of the strap to touch the bolt, and after a lot of bending I got it to slide on just enough to try and put the nut on.

Shiny-Stainless-Tank.jpg

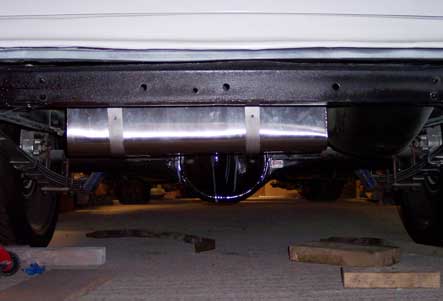
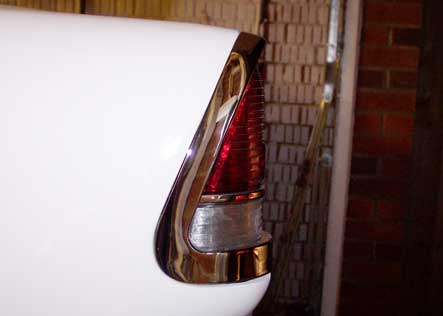
It took ages to get the nut on, and when I did it was tight after 3 or 4 turns. It was enough to hold it in place, so I moved on to the other side. That was nowhere near the bolt, so I decided to drop it down again and clearance where the filler neck hit the floor. The nut wouldnt turn at all, and no matter whet I did I couldn’t shift it. I tightened the nut on the other side up to the floor to try and hold it steady, but still would not come off. I ended up having to saw it off with a hacksaw, which was a pain in the tight space. I then could not shif the nut that I’d tightened to the floor, so ended up tack welding the bolt to hold it steady, then removing the nut, and then the bolt. By this point I’d had enough, so I took the light that I wasn’t happy with out and ground it down to get a better fit. I got it much better than it was, but still too much of a gap at the bottom. I decided to give the tank one last try, and hammered in the dent in the floor for the neck before trying again with the old bolts. They fit easily, and a quick compare showef the new bolts to be about a centimetre shorter. I hate days like this.

Light-Adjustment.jpg

Filling the Cowl Vents

The Camaro was suffering from soggy carpets, and after a lot of testing with a hosepipe I realised it was the cowl vents and the bizarre way they drain inside the car on a first gen Camaro. I’m taking the opportunity to fit air conditioning and heating to the car, so no longer need the cowl vents to supply fresh air to the cabin. I pulled the panel off the car after struggling to unhook the wipers and measured up for a cardboard template. I’ve always cut out patterns in metal with the nibbler or the grinder, but now I had a bench grinder and a jigsaw I did it the easy way. I got a much better fitting panel much quicker than normal. Maybe I’m learning?

Cowl Vents Filled

I cleaned the paint off around the edges and carefully tacked them both in place. It’s a surprisingly awkward shape to do as it curves gently across the width, but a bit of gentle hammering got it right. With it all tacked, I slowly worked my way round and filled it in and only managed to blow one hole in it which is good for me. A quick skim of filler with extra hardener in took nearly an hour to go hard in the sub zero temperature of the garage, One of these days I’ll get some heating out there!. I covered the hole in the car up with some plastic sheet rather than sand and prime the panel to put it back on. The whole car needs painting, so the painter can sort that out for me. Seems strange handing some of the work over to someone else after doing the ’55. Just need to drill some holes for washer vents before it’s done.

And Now Some Filler

Rear Lights and AC Fitted

I drilled out the holes for the Vintage Air box and bolted it in place. With that in I could see how much space I had left to put the LT1’s computer, the alarm and the relay and fuse boards. It’s going to be a tight squeeze in there if I want to put anything else in. After a lot of moving round the only place I could find to put the computer that would leave enough room for the loom to connect to it was behind the clock on the passenger side of the dash. I need to make a bracket to hold it in place which I can tie into the Vintage Air box. With that done I did a bit of tidying up, cleaned up the master cylinder and gave it a coat of black paint. I called it quits out the garage, and went indoors to wire up the rear light clusters.

AC-Box-in-place.jpg

It needed a few changes from the new American Autowire loom so that I had yellow indicators rather than flashing the brakes. With them both done and some plugs put on the end I packed in for the night. On Sunday I fitted the lights as best I could, one side fits like a glove and one is miles out. Not much I can do about it now short of re-doing the back end, so it’ll be like that for now. I also put the emblem on the boot to see what it all looked like and was chuffed to bits. I ran the rear body harness and connected it up to test them all and they look great. I also put the master cylinder on out of the way and cleaned up and repaired the boot lock and handbrake mechanism. All coming along nicely.

Oooh-I-got-Lights.jpg

Wiring Take Two

After seeing the state of the Camaro at the bodyshop that was storing it, I decided to pay to have it recovered back to the house and put it on the drive. It wasn’t going to be going anywhere quickly as Christmas was in the way and it turned out that I had a load of rear chassis damage and a bent axle. In a moment of madness I decided to re-do all the engine wiring as I hated the way it was when I got it, and it was unreliable as well. I pulled all the engine loom off, cut all the connections and took it back indoors where it was warm. With it all laid out on the floor, I positioned it all where it should be an worked out what was missing, what needed extending, and what could just be cut out.

Spaghetti Anyone?

I wanted to bring the computer inside the cabin and hide it under the dash, as the existing wiring meant lots of the loom just hung over the engine to the front of the car. A lot of the wiring needed to be extended to do this so I cut up the spare loom from the ’93 that I had and used the wires to extend it. Along the way I found bare wires, taped joins and insulation that was torn through. With it all repaired, I moved all the relays to a relay board, and put a new fuse board in for the engine. Once I’d done all that I got it back in the car, double checked it and found I’d forgotten to lengthen two of the injector leads. It was so cold out on the drive the soldering iron wouldn’t melt the solder. I got a bigger iron, and finished it off on a freezing day just after Christmas. With the light going, I was desperate to get it done, and just as I was ready to test start it, it began to snow. It fired up first time and ran well with snow hissing on the headers and Poppy running round excited to see the snow. I popped the bonnet back on and called it a day happy that all the work had been worth it, and Poppy and I went off to play in the snow.

New Loom Run

A bit of Wiring Now

The kids were both ill on Saturday. so I spent the day in the house. While Poppy was making some Christmas cards I made a start on the wiring by wiring up all the gauges. I wired for the electronic speedo too which should be here before Christmas hopefully. With all that cut and soldered it’s one less thing to do at least. Sunday I got some garage time, so made a start on wiring the rest of the car. I got the fuse panel in and roughly laid out the wires from it over the column. Once I knew where it all sat I cut and soldered the Raingear intermittent wiper switch. Controls-In.jpg 
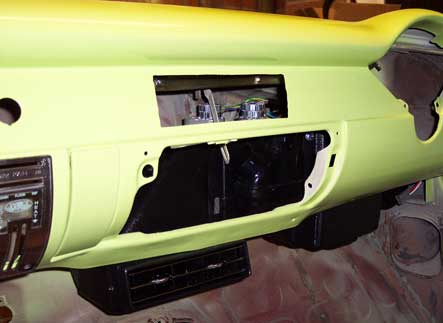
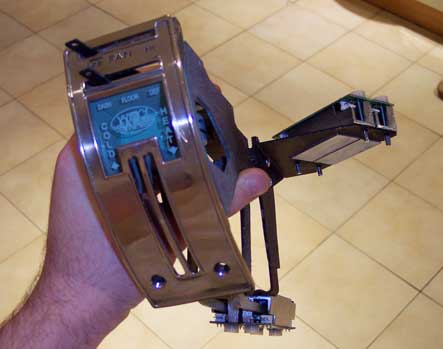
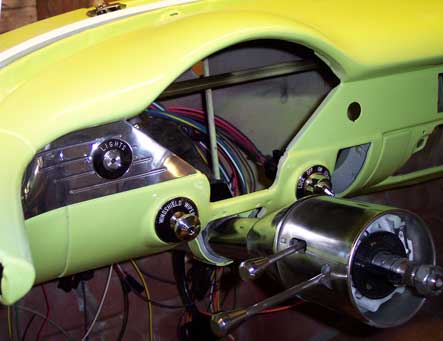
I’m trying to work out what will fit under the dash and where it all sits so I fitted the switch and bezel which suddenly made it seem closer to being finished in my head. I also wired the ignition, and the lights then got the Vintage Air AC kit from the house. A quick skim through the instructions revealed that I needed to remove the factory defrost duct, which was behind the Raingear wipers. It was a pig to get out, as you cant get to the bolt that holds it in, especially with the newly fitted switches in the way. To top it off, I dropped the spanner down the A pillar, and it took me twenty minutes to hook it back out. With it all bolted back in, I put the pipes on the Vintage Air box and swung it under the dash to bolt in. Except I couldn’t. I’ve welded up the holes it uses. So it’s either drill them back out or work out a different mount. Wiring-Started.jpg

Loads of Little Bits Done

I set out today with no real plan other than just get on with it all. I started off putting the rest of the screws in the trim, then fitting the window fuzzie on the back door. I wanted to check the lock mechanisms worked as they should so I fitted the lock oin the drivers side, and took the handle off to give it another polish and fit the gaskets. The chrome is pretty much knackered on the handles, so I gave up and refitted it. I cleaned up the column clamp I got second hand, and bent it to fit the Flaming River column.

Ooh-Dash-Dash.jpg

With that done, I masked up the inside of the car, mixed up some paint, and re-shot the dash with my Devilbiss spot gun. I did the column clamp as well, and the door jamb that I’d missed. While that dried, I stripped down the two rear light inner plates. Once they were cleaned up, I drilled them for the LED lights and fitted the new gaskets and lenses. By now the paint had dried enough to fit the clamps, so I did that and tried some of the new dash trim. One last thing I did before calling it a day was cut the steering rod down ready to pin and weld. All going great at the mo.

Steering-Stuff.jpg

Notching for the AC Compressor

With the drivers side of the engine being reserved for the supercharger, I needed to get AC, Alternator and Power Steering all down the passenger side. The stock brackets hit the A arms, so I found a Street and Performance set that put the AC low, but would not clear the frame. I really wanted AC so I decided to get it and notch the frame. With the AC mocked up on the bare engine block, I measured and marked it out and cut it roughly with the grinder. I kept checking it by lifting the engine in and out which took a fair bit of time, but at least I got it right. AC-Fits-Yahoo.jpg 
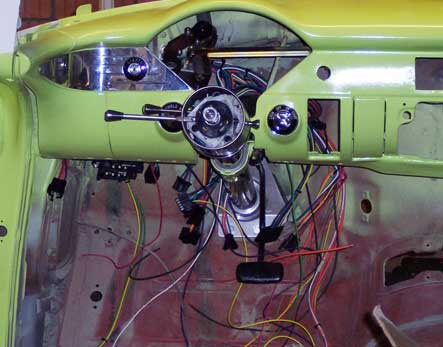
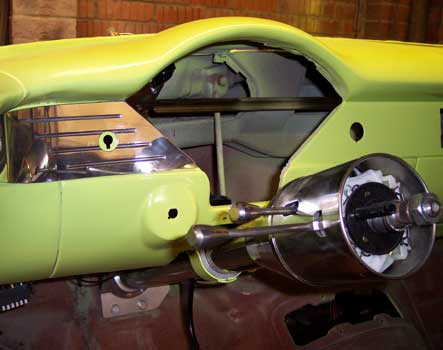
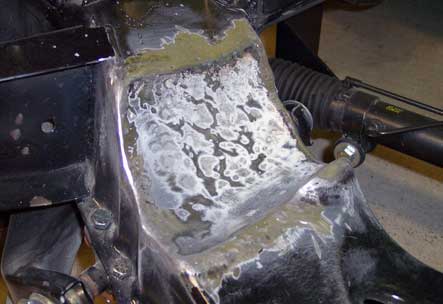
Once I was happy that it would fit, I cut a cardboard template and cut a metal version with the jigsaw. It was awkward to get the curve right as it was different on both sides, and angled, so after a while I got it as close as I could, tacked it in and hammered it into shape as I went. With it all tacked in, I did one final test fitting just to make sure, then pulled it back out. I ground it all out, turned the welder up and welded it all in place. Once it was all done, I ground it all smooth round the edges then gave it a quick sand with the air sander just to check it was all smooth. Looks good, but I’ll give it a quick skim of filler even though you’ll never see it. I’ll know it’s there, and it’ll bug me if I leave it. The engine can go out for reboring and balancing now. Notchity-Notch.jpg

Still More Trim

It’s getting cold now, so it’s not as much fun spending time in the garage. The temperature outside was down as low as -2 in the mornings according to the gauge in the car and no heating doesn’t help. I got a few hours on it on Saturday and finished off the rear window trim before going through the shed looking for the missing paint dividers. The box in the shed turned out not to contain them, but the clock was in there which I was wondering where it had gone. They turned up in a box of what I thought was just the old loom, along with a few other bits.

Divider-On.jpg

In keeping with the rest of the trim, I cleaned all the paint off the dividers and polished them up, then called it quits for the day On Sunday I set about the long rear spear which seemed to have the hardest paint in the world on. It took me two hours with the grinder wire brush to shift it all, and by the time I starter polishing it I was frozen. I put it on the car which was a pain as I spun one of the trim clips, so had to keep loosening it, spinning it back in with some pliers on the back, and then tighten slowly. Once most of the clips were on, I gave up as I couldn’t feel my hands and it was harder than it needed to be. I took the heater controls off the old unit and went into the warm. My Vintage Air kit had turned up this week, so I stripped it down and fitted all the electronic controls for it. I didn’t realise the control levers were snapped, so need some new ones. Looks good tho.

Vintage-Air-Controls.jpg

On to the Other Side

I had a day off work on Friday, so made the most of some garage time. I got the Chevy out into the daylight and turned it round in the street. It’s the furthest the car has been for a long time. I took the opportunity to have a big clean up in the garage as well and to make some space for the old unit from the kitchen that I was putting in there. I had also sold the rotisserrie so needed to dig it out ready for collection on Saturday. I got all the rubbish outside in a nice, neat pile and started to put everything back away when it tipped down with rain. I left all the rubbish outside for another day.

Other-way-round.jpg

With a load more space to work in, I set about the trim for the drivers side of the car. There were some deep scratches to clean up and it took ages to get it in a half decent state. I think it ended up looking better than the other side, but we’ll see when it’s out in the sun. Despite being as careful as I could be, I still managed to chip the paint. I’ll have to re-paint some of it in the near future I think. I also gave the front bench seat away, as there is no way I’ll be running a bench once it’s finished. I really need to get the motor out for balancing as well so I can get on with that side of life.

DS-trim.jpg

Vent Windows Done

I made a start on the vent windows on Saturday. The rubber seals must have been the original ones, and had gone rock hard. They were covered in silicone sealant as well just to make it even harder to clean up. I ended up cutting it up with a knife and scraping it out piece by piece. The bench grinder I bought a few weeks ago had fallen to bits, so I bought a better one and used it to polish up the frames. This one is more powerful, so it was a lot easier to get a decent shine quickly.

Vent-Window-In.jpg

With the rubbers installed, I test fitted the window and checked the mechanism. I wasn’t happy with it, so pulled it all out and cleaned and oiled it. With that done, I fitted the pulls for all the handles and locks, and found the drivers door handle spring was busted. To make it worse, the inner skin is split too, so that will need welding up and bracing. I managed to pull the remains of the spring out and bend it over to make it half decent. I swapped it with the one from the back door just to be on the safe side. A quick tidy up of all the mess I’d made, and dug the master cylinder out ready to clean up for next week.

tother-vent.jpg