Random Unplanned Work

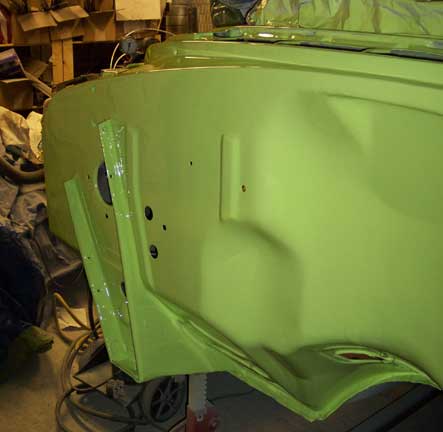
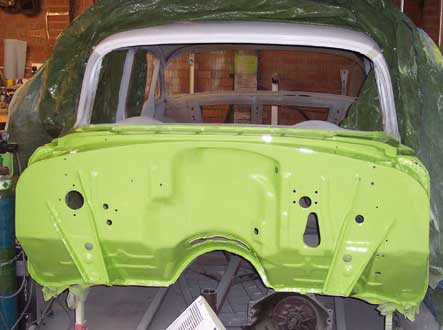
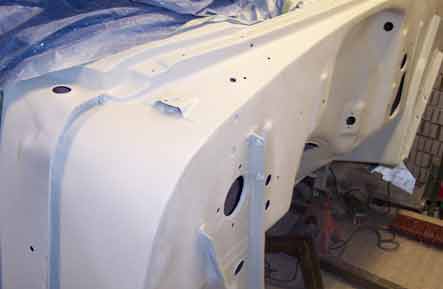
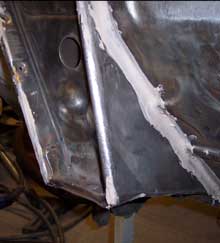
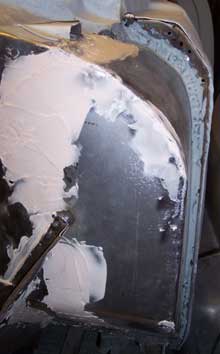
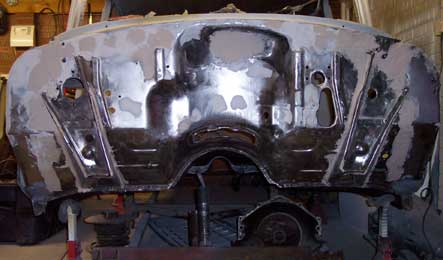
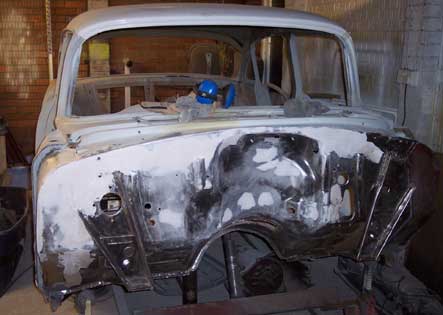
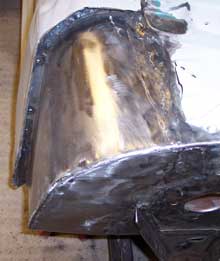
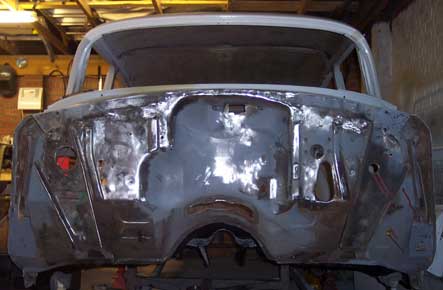
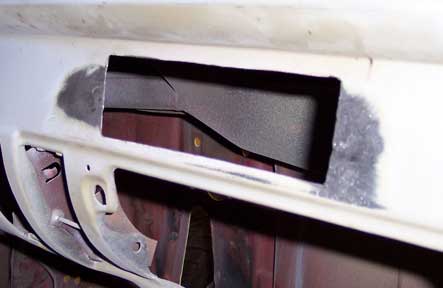
I’d planned to do the battery cable this weekend, but didn’t get round to getting the ends. I decided to have a bit of a tidy up and find some other jobs to do. I needed to clean up the floors inside where the welds for the firewall had burnt the red oxide off, so I emptied all the parts out of the car and had a look at it. One of the bits that were in the car was a cage for a head unit that I’d got off my dad so that I could cut the Camaro dash to suit, and I decided to make sure I could fit one in the 55. The width of a modern unit makes the cut through the two holes for the original, so after marking it all up, I cut it out and cut two little patches and welded them in.

EuroRadioCutout.jpg

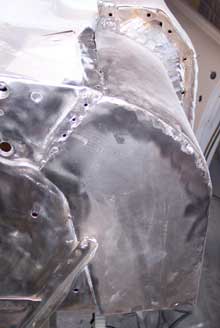
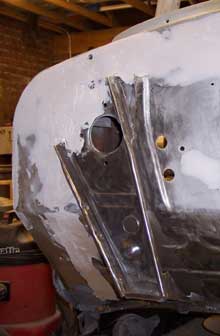
With that done, I sanded off the burnt paint ready for a quick coat of paint later, and then decided to clean up the hinges ready to refit those. Two of the covers on the front hinges were split, and they were all bent, so after a bit of welding and hammering they were ready. I bolted up the passenger side ones, then grabbed the doors and fitted them out of the way. These two need finishing off ready for paint and it’ll be easier to do it with them on the car. An hour or so of adjusting, and some straightening of the front door edge and it all looked good. I would have put the other ones on as well, but I’ve lost one of the bolt in tabs, so had to make another one. I havent got a set of taps to thread the hole, so that can go on my shopping list for next weekend. Amazing what a difference it makes with the doors on.

2_Doors_on.jpg

Radiator and Fuel Tank Done

Didn’t get much time this weekend, so made the most of it. On Saturday morning, the guy who’d won my Boyds wheels on ebay came to collect them. I’d brought the old wheels from the Camaro home with me, so they went on for now. The car looked really bland, and I was gutted. Ah well. Time to move on. In the afternoon I fitted the fuel tank sender to the tank, then dug out the straps only to find I’d forgotten to paint them. I decided to give them a quick clean and use them anyway. I hung it under the car, then connected the braided hose ready to connect the hard line.

ShinyRad.jpg

I’d already partially done the fuel line while the body was off, so I cut it roughly to length and then made the end. On Sunday I finished it off with P clips and then moved on to assembling the radiator. I drilled the frame to mount the fans, then bolted it all together with stainless bolts. A quick test fit and a few photos, then I took it back off the frame and wrapped it in cardboard and cling wrap to keep it safe till it’s needed. I was running out of time again so I quickly measured up the length of cable that my mate John had given me to do the boot mounted battery. Plenty spare, I’ll get onto that next weekend and give the motor a spin over with it all done.

Spals.jpg

More Cleaning and Painting

It’s been a while since I’ve done much in the way of cleaning rust and paint off, so it was strange doing it again. I spent a good few hours cleaning the core support and filler panels with the grinder brush. Some of it had to be scraped by hand, and when it was all done, the garage was filthy. I drained the comprssor out and connected the air sander to finish off cleaning it, only to find it was spinning slower than it should be. I ended up stripping it down to clean and oil it, followed by spraying oil everywhere while testing it. Time to pack up for the day.

WashingLine.jpg

I sanded it all over and cleaned it down with thinners before hanging it from the roof ready for painting. I also unpacked my brand new petrol tank, cleaned it down and masked it all off and hung that up too. With so much stuff in the garage, I decided to hang a tarpaulin across the middle of the garage to protect the car and some other bits. A quick and painless coat with etch primer, followed by a thick coat of black and I was done for the weekend. On to a bit of assembly next weekend hopefully.

Tank.jpg

Fitting the Radiator

I haven’t done any work on the ’55 since before Christmas, and I was keen to get back on it. The Camaro is over in Bristol sat on a ramp waiting for a new steering box, so I decided to do the radiator mounts for my shiny new PRC aluminium radiator. I got the original radiator and support down from the garage roof, stripped the horns and regulator off and pulled the radiator and filler pannels off. I put the frame on the front of the car and clamped the tabs of the radiator on ready to drill.

Core_Support.jpg

With it all clamped up and levelled, I drilled the holes and bolted it on. The filler panels would cover the inlet and outlet on the new radiator so I decided to fold them back to clear. It fitted but looked ugly, so I folded the edge again to make it shorter than the width of the radiator. It’s still not too pretty, but works perfectly. I think I’ll put it all together and see what it looks like before I worry too much.

Core-from-Front.jpg

The Big Lift

After getting the firewall painted last weekend, I was looking forward to getting the body back on the frame and making it look like a car again. I had the problem of the wheels not fitting under the body to sort as well. I got around that by swapping the wheels front to back, looks odd but it should fit according to my measurements. I needed to get the body up in the air high enough to get the frame under the body, and then back down again. I had planned to get a few people round to help lift it, but after thinking about it for a while, reckoned I could do it on my own.

Assembled-and-outside.jpg

I put wood under the axle stands and used a set of shelves under the jack to get it higher. Once I got it as high as I could, I put some paving slabs under the stands but still needed more height. I ended up with the jack on wood, and a stand at full height and a piece of box section to get it high enough to get a shelf under each side. I pushed the frame out, then lined it up ready to go under before taking the rear wheels off to get it between the shelves and sliding it under on the jack. Once in position, I used two strops to lift the back of the car up, then lower it down slowly while holding it steady. It came down within about a quarter of an inch of where it should be. I put the engine carne through the door frame and lifted the body off the shelves, then down onto the frame. I spent the rest of the day lining it all up and fitting the body mount bolts, while grinning like a fool. A few hours of tidying up and sweeping out months of dust and I called it a day, tired but happy. Space to work on the Camaro when it arrives, and room to finish the 55.

Yippeeee.jpg

First bit in “The Colour”

After painting with high build last weekend, I managed to sand through it while giving it a quick rub over for the top coat. I also had run out of paint, and with the new paint I got being a different colour grey, I decided to paint the entire firewall first.

PSFW_Painted.jpg

Once that was painted, I left it to flash off before covering it in a coat of white as the topcoat needs white under it to get the colour. Once that was given long enough to flash I opened the new colour, mixed it and painted it. While I was washing up the gun, I looked back across the garage and thought I’d got green paint over the white doors, but on checking it was just the reflection from the paint. It’s bright. Very bright, and I love it. Hopefully I’ll get the body onto the chassis next weekend which will give me space to work on the Camaro when that arrives.

Firewall_PAINTED.jpg

Firewall Painted

With Christmas almost upon us, I spent a lot of Saturday getting the Christmas trees and lights up. With it all done, I finished off sanding the firewall, which I’d spent a few hours on this week before work. There were a lot of pinholes in the filler, and the firewall had seen fifty hard years worth of dents, so it was never going to be a thing of great beauty.

Firewall_Primed.jpg

Once it was all relatively smooth, I gave the front of the garage a thorough clean out with the air line and vac, then tack ragged the firewall and covered the rest of the car ready for paint. A quick coat of etch primer made it look a million times better than I expected it to. I left it dry overnight, and in the morning gave it another quick fill with stopper. A quick bit of Christmas shopping and then back to sand it off. Another quick touch up with etch primer, followed by the remains of the tin of filler primer and I called it a day.

Firewall_Primed_Front_On.jpg

Boxing The Front Mounts

Front_Mount_Boxed.jpg

Armed with a new bottle of gas I set out to box the front mounts (Why? I don’t know, I just did) and finish welding on the drivers side cowl panel. A few quick cardboard templates and I had the inner covers cut out with the nibbler. Once they were tacked on solidly, I hammered the edges over to give a smooth edge. It was really awkward to do as you had to squat down on the floor and lean underneath to weld, but it all went OK.

DS_Cowl_Waiting_For_Sanding.jpg

The outer panels turned out to be completely different shapes on either side, and the shape of the legs made it easier to fold an L shaped panel to cover the gap at the bottom. Once all that was done, I finished welding the drivers side cowl panel on and hammered the bend to better match the front panel. Once all this was done, I spent the next hour with the grinder smoothing it all off. I was more than happy to finish that off, as my hands were numb by the end. Some of the joins came out so well that they didn;t need any filling. A quick clean up, and a quick coat of filler over the not so pretty bit, and I called it a day.

Firewall_Pre_Sand.jpg

Drivers Side Cowl Corner

DS_Cowl_Corner_HalfOn.jpg

On Saturday I started making the second outer cowl panel, and ended up re-doing the patches that I had done previously. After a few hours of cutting and shaping, I had a panel that I was happy with. I think I made a better job of this one, but nobody will see it anyway. I ground out the joins a little ready to weld it on, then painted the inside of the panel and the area it would cover. I’d pretty much run out of time then, so closed the door on it ready to continue on Sunday.

PS_Cowl_Half_Filled.jpg

It all started to go wrong for me on Sunday, my grinder’s power lead broke and went on and off intermittently. Then I ran out of gas for the mig, so I cleaned the rest of the paint and dirt that I could reach with the grinder brush then gave it a quick skim of filler on the passenger side and across as far as the unfinished corner. A quick half hour with the DA sander an I could see how it will look when it’s finished. A couple of low spots need filling, but overall I’m pleased with it. I think I’m going to box the support uprights in to smooth it a little more, but thats a job for next weekend.

Firewall_Today.jpg

Passenger Cowl Corner

OuterCowlCornerOn.jpg

I bought a few sheets of metal ready to make the outer cowl panels, and on Saturday I drew the template onto one and cut it out roughly with the air nibbler. After a bit more shaping with the grinder I folded it on the garage wall corner as that was the only straight edge I could find that was big enough. The rest of the edges I folded and hammered in the vice and test fitted the panel. After a few adjustments, I decided that the patch I had made a good while back had to go, so I ground it off and cut a new one that would fit better. The result was much better, though ultimately no one will see it as it sits under the cowl panel. Once it was done the panel sat a lot better than before and I re-trimmed it to fit.

PS_Cowl_Corner.jpg

When I was happy that it would fit, I trimmed the rough edges of the cowl and the new panel to suit. I made sure all the edges were clean to weld, then painted the inside with ratlle can primer to give it some protection. While it was drying I hammered out the welding I did last week where it was a little lumpy. Once that was done, I tacked on the panel, made a few adjustments, then worked my way round till it was all on. A few more small panels were needed to smooth the joins over, and the gaps were filled with weld. After a while with the grinder it was smooth enough to sand ready to fill. Now I just need to do it all again for the other side.

Firewall-XL5.jpg