Category Archives: Body

Plenty of Space

I clamped all the bits of the firewall recess in place, and pulled the hood off to check I had plenty of clearance for the motor. I decided to join the top two halves together first so cut a piece of sheet metal that was long enough to allow me a bit of lattitude when I put the bottom two pieces on. I tacked the top edge first and gradually bent and hammered it into shape as I worked down the seam.

Firewall Back Together

With it in the right shape, I clamped it back in place and decided on how far down I wanted the bottom edges to be. I cut a template from cardboard and transferred it to sheet metal before working my way slowly along the edges. It was a lot harder to keep it all in line so I needed to hammer it as I went. I did the same for the other side and then started to slowly fill the gaps in between the tacks. With it all done a quick test fit and it needed some shaping to clear bellhousing. I started to shape a bulge in it to give me enough clearance in case I go to a 4L80E when the 4L60E blows up. I was out of time then so called it a day.

Motor Clearance

Plenty of Metalwork to Do

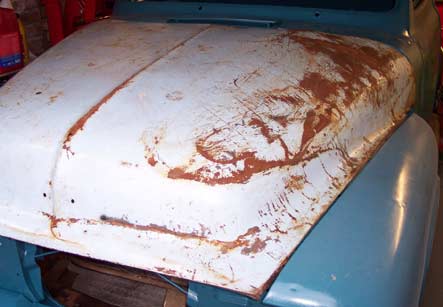
I’ve been working on the roof and hood for a few weeks now, and have got rid of the worst of the creases and dents. I’m slowly getting the hang of getting the metal smooth again afterwards but it’s a real struggle to do. The hood had a deep crease in it that I couldn’t get behind to knock out, so ended up welding washers to the crease and slide hammering it out. The peak in the front is so far gone I gave up and started to make a new one. I also sliced the door up and bent it to fit the frame as it was way out, and am in the process of re-doing a lot of the patchwork where the roof has been chopped and not very well put back together.

Hoodley Creaseworthy

I’d also cut the original firewall recess out to set the engine back further, and kept it to cut up and make a new one. After a bit of measuring, I chopped it into four pieces and trimmed the firewall a bit further to get it all to sit where I wanted. I couldn’t get the hood off to check the clearance as it was pouring with rain and I had nowhere to put it with the Bel Air in the garage as well. If it’s all OK, and it certainly looks that way, I’ll tack it in and make up the filler pieces then pull it back out to finish it off. I plan to smooth the rest of the firewall when the cab is off the chassis and I’ve worked out what I’m doing with the steering column and pedals.

Firewall Sectioned

More Hammering

I spent last weekend working on the hood again, and got the crossmember out so that I could repair the dents and the crossmember itself. It was pretty much beyond repairing nicely as it was crushed and snapped so I hammered and bent it to as close to correct as I could and tacked it back together. I think I’ll end up having to make a new one but it’ll do for now. I also got the worst of the dents out on the drivers side. The front lip was buckled and split so I got it back as best I could with a prybar and lump hammer. At that point I called it quits for the weekend.

Hood Getting Better

The plan for this weekend was to try and get the edges straight so that it would fit before I carried on with the dents. The hood edge is pretty much dead straight where it meets the wings, so I clamped a piece of box section to it as a guide and set about it with the hammers. With it striaght I could see how bad the front edge was, about an inch too high and the inner crossmember was bent that much too. That took a lot of hammering, clamping and levering to get it back where it should be. I tacked it all up and test fitted it and it looks pretty good so far. Still needs plenty of work, but getting there.

Hood Edge

The Hood Lives to Fight Another Day

I had a few more hours working on the truck on Saturday, and spent the time on the roof again. I wanted to try and get a small area of it as smooth as I could so I can tell if I’m going in the right direction. I spent ages gently hammering with a planishing hammer and it seems to be getting smoother. It will need a lot more to finish but I’m hoping to get away with as little filler as possible rather than hiding it.

Tommo.jpg

I also wanted to get the hood out of the shed and back on out of the way. I had made a start on a lot of the really bad dents but had been told that it was beyond economic repair to do it properly. I’d had no luck finding a replacement as yet, so I laid it down on the garage floor and had another go at it to see if I thought I could do it myself. After a lot more bending and hammering I think I can fix it myself. There are only two really bad parts left on it now, both of which are behind the crossmembers. The plan is to pull them out and get the hood back into shape then repair the crossmembers. It sits pretty well now, and I have so much space around the engine it’s ridiculous.

Hood-round-two.jpg

Making a Start

The last of the panels for the truck were on the drive when I got home the other day, so I had everything but the hood shoved in the garage (that had to go in the shed for now). After discovering the gearbox was dead on the ’55 on Saturday I decided to do some work on the truck instead on sunday. I hung the front wings and the majority of the front loosely so that I can still push it in and out and it’s out of the way as the roof is now well and truly full of truck panels. I had two front valance panels, one was full of holes and the other was bent like a banana. I got the worst of the dents out so I could use it for now and bolted it up.

Front Hung

I decided to make a start on some of the bodywork, and the doors had been bugging me. They were a completely different shape to the openings at the back, and I wanted to work out if I could fix it in the door or if I’d have to re-do the chop. After making a few slices with a hacksaw I had enough movement to pull it in so I’ll weld that up when I can get the ’55 out of the way. With that done I felt like doing some more hammering, so made a start on the roof. It was really badly warped where it had been chopped, and had about an inch of filler in it when I fist got the truck. I spent a few hours with the hammer and dollies and got it loads better. It needs a few days work or so I reckon to get it good enough, so that’s something to look forward to.

Roof Started

Body is Blasted and Sealed

The truck went off to be blasted and sealed a few weeks ago as planned. It was in a real sorry state after being vandalised and left in the rain. I went through everything with the bodyshop, and asked them to straighten the cab while they were at it as it had been folded in on the corner and bent the door frame. They pulled it back straight with a hydraulic jack thingy and knocked the dent out too. Theres an awful lot of little dents that still need doing, but the rest of them I can have a go at.

Cab Primed

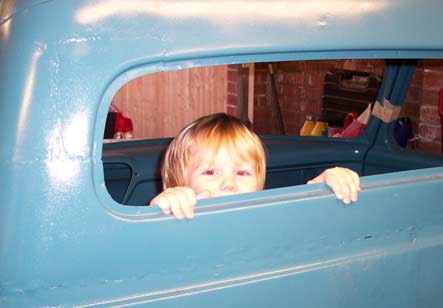
The only part that I am really worried about is the roof. It’s badly warped and lumpy. I got them to take all of the old filler out before they painted it so at least I know its not over rust. I’ll have a go at it myself, but I think that may end up back down there to be done. Once it was all sealed, they mixed up a load of left over paint and gave it a coat of colour to waterproof it. The colour they ended up with was blue, I quite like it. Orange may be better tho…. When I get it back in a week or so its going to have to try and squeeze in the garage or back under a cover. I’d prefer it to be in the garage obviously, but it’ll take some creative re-arrangement in there.

Cab Inside