Category Archives: F-100

Door Edge Back Together

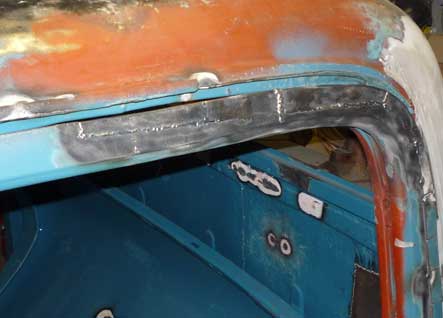
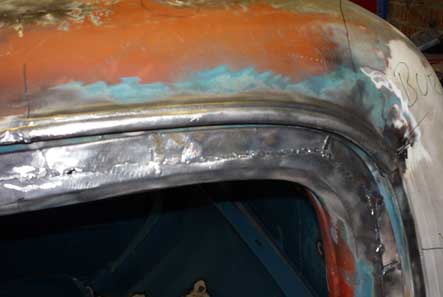
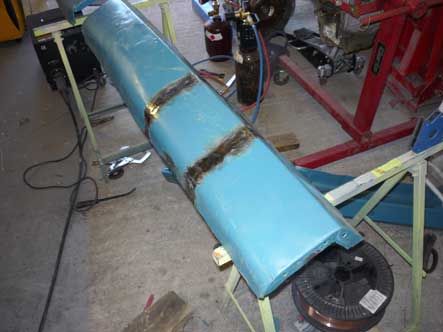
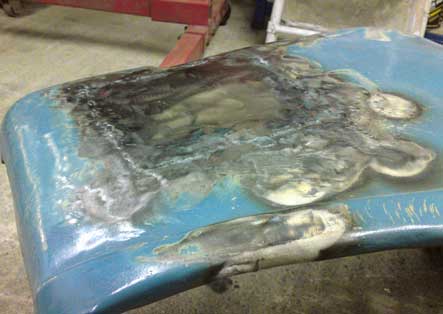
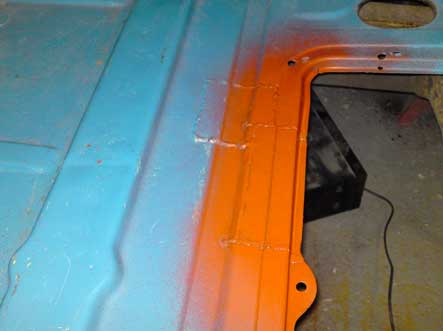
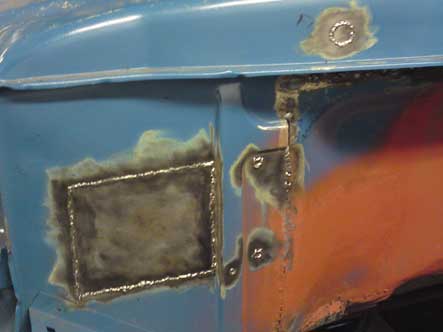
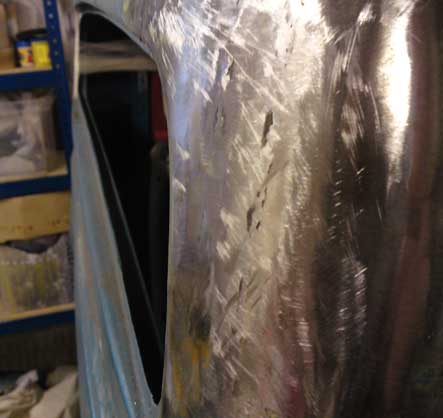
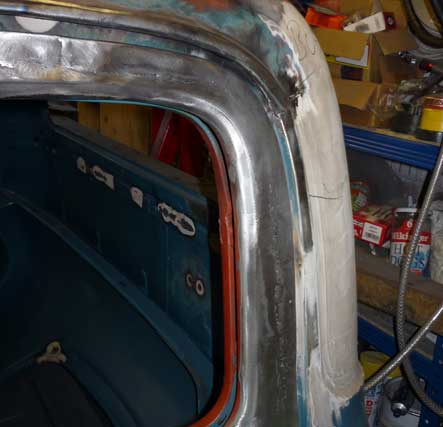
I’d chopped the door into lots of bits to stretch it out to fill the frame better. It was all over the place, and nothing like the shape of the frame originally, but didn’t look much better as loads of tack welded bits. I clamped the door onto trestles and it was now my test for my new TIG welder. I found it a lot easier to get a nice flat weld, but also way too easy to get carried away and distort it by doing too much at a time. Ah well, I need the hammer and dollie practice. A quick buzz with a flap disk and it was done for now.

Door-Edge.jpg

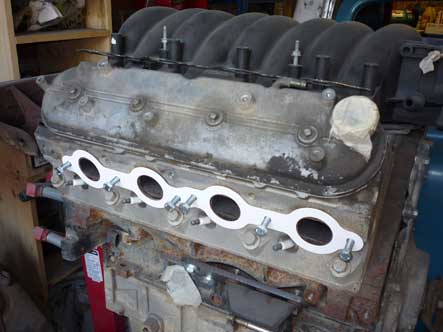
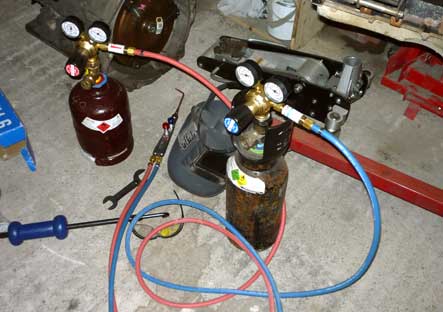
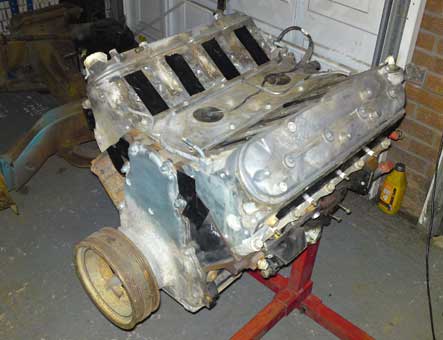
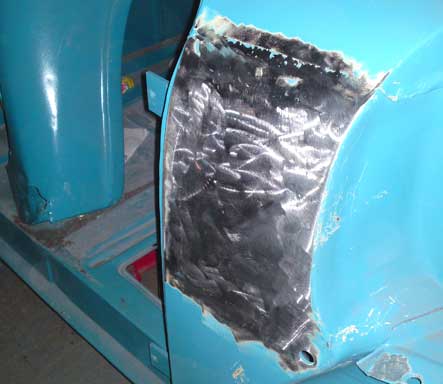
I also spent some time with the oxy/acetylene torch doing some shrinking on the back of the cab. Nothing exciting to look at, but at least it wasn’t oil canned anymore. I also found some CAD drawings for LS1 header flanges on the net, so got them cut out of cardboard on the plotter at work. They fit like a glove, just need to get them lasered out of stainless at some point. May even have a go at making my own headers if I feel brave. Or not.

Paper-Flange.jpg

Gutter Talk

I’d pulled off the rotten remains of the gutter on the drivers side, and had now got to the point where they either all had to be cut off, or I had to make some new ones. I decided I’d just get on with it and make some. Firstly I made a plate to hold the shrinker too as it was a pain to use clamped in the vice. I could then clamp the plate really tight so it didn’t move about.

Gutterless.jpg

After a bit of measuring, I cut up some more of the donor hood and folded up a strip of it to use. It was a few inches more than I needed, but was the right size. With the shrinking jaws swapped for stretching ones I made the curve for the end of the rail then cut it down to the right length. A few quick tacks with the gas welder and it was done for now. It’s between the two lines on the roof in case you’re trying to work it out!

Guttered.jpg

Air Ride

I spotted a second hand Air Ride setup for sale on the NSRA website, and it turned out to be the guy who I bought the wheels for the ’55 off. A week or so later, and two large boxes arrived at work for me. It was all as it had been pulled off the car, so it was covered in muck and looked a bit of a mess. I spent a few hours cleaning it all up, then temporarily plumbed it all together for a test. With the wiring setup to run off a battery, I turned it all on. It buzzed away for a few minutes, then had a go of the switches and both sets started to move about as you’d expect.

Bags.jpg

It was all new to me, and I thought it was really cool. I guess I need to get out of the house more!. Happy that it all worked as it should, I pulled it all back to bits, cling wrapped everything but the shocks and put it all back away. The mountings were swapped front to back for what I wanted, so I pulled both sets to pieces, and put them back together with the different tops on. A quick test of how they look in the frame before they got packed away too. Wont need them for a long time yet, but one more tick off my wishlist of bits.

Baggins.jpg

Frame out of the way

I needed to get at the other side of the cab and do some work, and I was really fed up of whacking my legs on the frame trying to get to my workbench or move around the garage. I decided that the answer would be to pull the cab off completely, take all the suspension off the frame and shove it on it’s side against the wall. When you type it out like that, it doesn’t seem like that much work does it? I don’t think a lot of the front suspension has been off in a long time, if at all. I ended up finally gettint it all apart at about 10 pm.

Cab-Off.jpg

The cab is now sat on wooden blocks and those red trolleys you can see underneath in the picture. The frame was just the wrong height to tcuk under the workbench, so it’s overhanging a few inches on the one side. It’s still a lot easier to work in there as I can now get at the bench, and both sides of the truck. Not exactly neat tho!

Tight-Squeeze.jpg

Front Valance Repairs

For a bit of a change, I decided to make a start on the front valance panel. I had two of them with the truck, one bent like a banana and one that was full of holes. I picked the one that was the straightest, and spent a while bending it roughly back into shape. I also wanted to fill the bumper slots, so the rusty one became a donor for repair patches and filling it in.

Valence_Before.jpg

After carefully cutting out the damaged bumper slot, I used that as a template for a piece from the donor, and after a lot of slow and careful welding it was filled in with very little distortion. A quick run over with the flap disk, and it was pretty much ready to go. It needs a fair bit of reshaping to get the rest of the dents out, but I’m happy with the result. I’ll do the other side when I’m fed up of doing something else!

Valence-One-Side.jpg

Feel the Heat

I really wanted to learn how to do heat shrinking properly after messing about with a shrinking disc and not being happy with the results. Knowing nothing about gas torches, I decided I’d rather play it safe and buy new stuff than set myself on fire. A quick chat with the welding supplies place round the corner from work and I bought a load of bits and rented some more bottles. With it all bolted together, I was still not convinced I wouldn’t burn myself and nervously lit the torch. I had made a test piece to shrink from an old bit of hood that I beat the heck out of with a ball pein hammer to get about an inch deep stretch in it. I gently heated it to cherry red, then hammer and dollied it flat. And that was it, done. I was amazed.

Oxy-Acetylene Kit

Convinced that it was a fluke, I got another scrap piece and did the same. To my amazement it came out spot on as well. At that point I decided I may as well have a go at one of the front wings. They were in a pretty sorry state, with a few bad tears, and were stretched really badly where I had tried to repair them with just hammer and dollies. After a few hours of heating, hammering and some gas welding (which I really like for some odd reason) I was miles further forward despite them looking like they had been in a fire. I even managed to get rid of the”oilcan” in the bead that made the bottom quarter pop too far in or out. Another thing to add to the list of “if only I’d bought one years ago I’d be miles ahead”. Smile

Roasted Wing

Filler on and Floor Patched

I’ve been doing loads of little bits and bobs on the cab, and with the constant rain and damp I was concerned it was going to be rusty before I got any primer on there. I decided the time had come to clean it up and start putting filler on. Quite a good feeling to go from hammering and welding constantly to filling. That didn’t last long, as I remembered how much I disliked filling and sanding. All progress tho.

Firewall Filled

There was also a big chunk missing out of the floor, and I was starting to get concerned about how much it was flexing when I climbed in and out. Afer a bit of origami with some cardboard, I folded up a patch piece in metal to put it back together. Not exactly a work of art but it will be under the carpet so it doesn’t matter in the least. A bit of rattle can primer and it’s another little job done.

Floor Patched

Less Holes and Motor Out

The passenger side firewall is full of holes for the heater and various other bits. I don’t have the original heater so it’ll end up with a different one in. I’d rather fill all the holes and re-drill for what I need than end up with spare holes like I did on the Bel Air.the panel was rippled where the heater hole was, so I taped it and cut it out before making a new one to go in it’s place. No real drama just lots of time later and it was done.I also filled in a few smaller round holes and I’ll grind it all down when I get on with the firewall.

Firewall Smoothing

It’s almost impossible to work on the firewall sensibly with the engine and box in place, even with the cab pushed back on the frame till it touches the rear tyres. With the Camaro out of the way, I got the engine and box on the hoist before taking the wheels off and dropping the frame down to allow me to lift it over the A arms easily. I split the 4L60E off the back, as it’s getting a 4L80E instead, and got the LQ4 onto the stand. A very quick clean up and re-sealed the holes before pulling off the water pump and some other bits to lighten it up a little.When I have some time I’ll clean it all up properly ready for stripping down. Think I’m going to have a go at building it myself. Eeek.

LQ4 on the stand

Re-Doing the Chop

Now I could get at the passenger side, I could sort some of the bad bits of the chop out. It just doesn’t line up that well where it’s been stuck back together and although I could just bury it in filler, I’d like to get it as good as I can. There was a vertical strip welded in to fill a gap on the pillar that I just cut out and threw away, and slit the welds back open. After a little bit of hammer and dolly work, I was happy that it lined up properly.

Ropey Chop

A few tacks, and I was ready to cut out the replacement filler strip. Again working slowly I gradually filled in the gaps then set about it with a file, a flap disk and the sander. That showed up the inconsistencies in the shape of the cab pillar, so I worked my way through that as well till I was happier with the overall look of it. I also started working my way along the roof seam and filling that in too as it dissapears in the centre of the chop so I’d rather it was smooth. The door pillar was also not smooth at the join, so that got cut again, slide hammered out, and re-welded. A lot of work but all worth it I think.

Bit better

A Change of Sides

I wanted to make a start on the passenger side of the cab, and as I couldn’t get to it decided to move the workbench and all the other junk to the right hand side so that the truck could go over there too. I moved the cab back into the right position and bolted it down temporarily before pushing it outside for the first time in a long while. The ’55 is away having the frame repaired after a minor accident, so the Camaro has been indoors in the dry.

Swapped

The first job I tackled was a nice easy one to get out of the way. I don’t like the louvered vent on the passenger side, so after taping the shape, I cut it out and set about making a new flat one. The wrecked hood got cut up again to give a new panel, and after a bit of careful bending and shaping it was tacked in. After an hour or so of filling in the gaps and waiting for it to cool it was ready to sand down. The blue line at the top of the pic is where the cowl joins the pillar, you can’t see the join on the panel. Well happy with how it came out, and really beginning to enjoy it when it goes right for once.

Louvre Be Gone